Setup Overview
Your Setup page includes four steps:- Connect your Meta account
- Connect an ad account
- Import campaigns
- Set campaign goals
Step 1: Connect Your Meta Account
To launch and manage campaigns, AdStellar AI needs permission to access your Meta ad accounts and performance data.How to connect
Navigate to the Setup page
Click Connect Meta Account
Log in with your Facebook credentials
Grant the requested permissions
Confirm the connection
AdStellar AI uses Meta permissions to:
- Read campaign performance
- Create and publish ads
- Read audience data
- Read pixel data
- Sync campaign performance data to AdStellar for reporting
Step 2: Connect an Ad Account
Once your Meta profile is connected, the next step is to link a Meta Ad Account to your workspace. AdStellar AI uses this ad account to sync data, import campaigns, and publish new AI-generated campaigns on your behalf.How to connect an ad account
Open Integrations and select the Meta integration
Click Connect Ad Account
Select your Meta Business Manager
Choose the ad account you want to connect
Click Connect
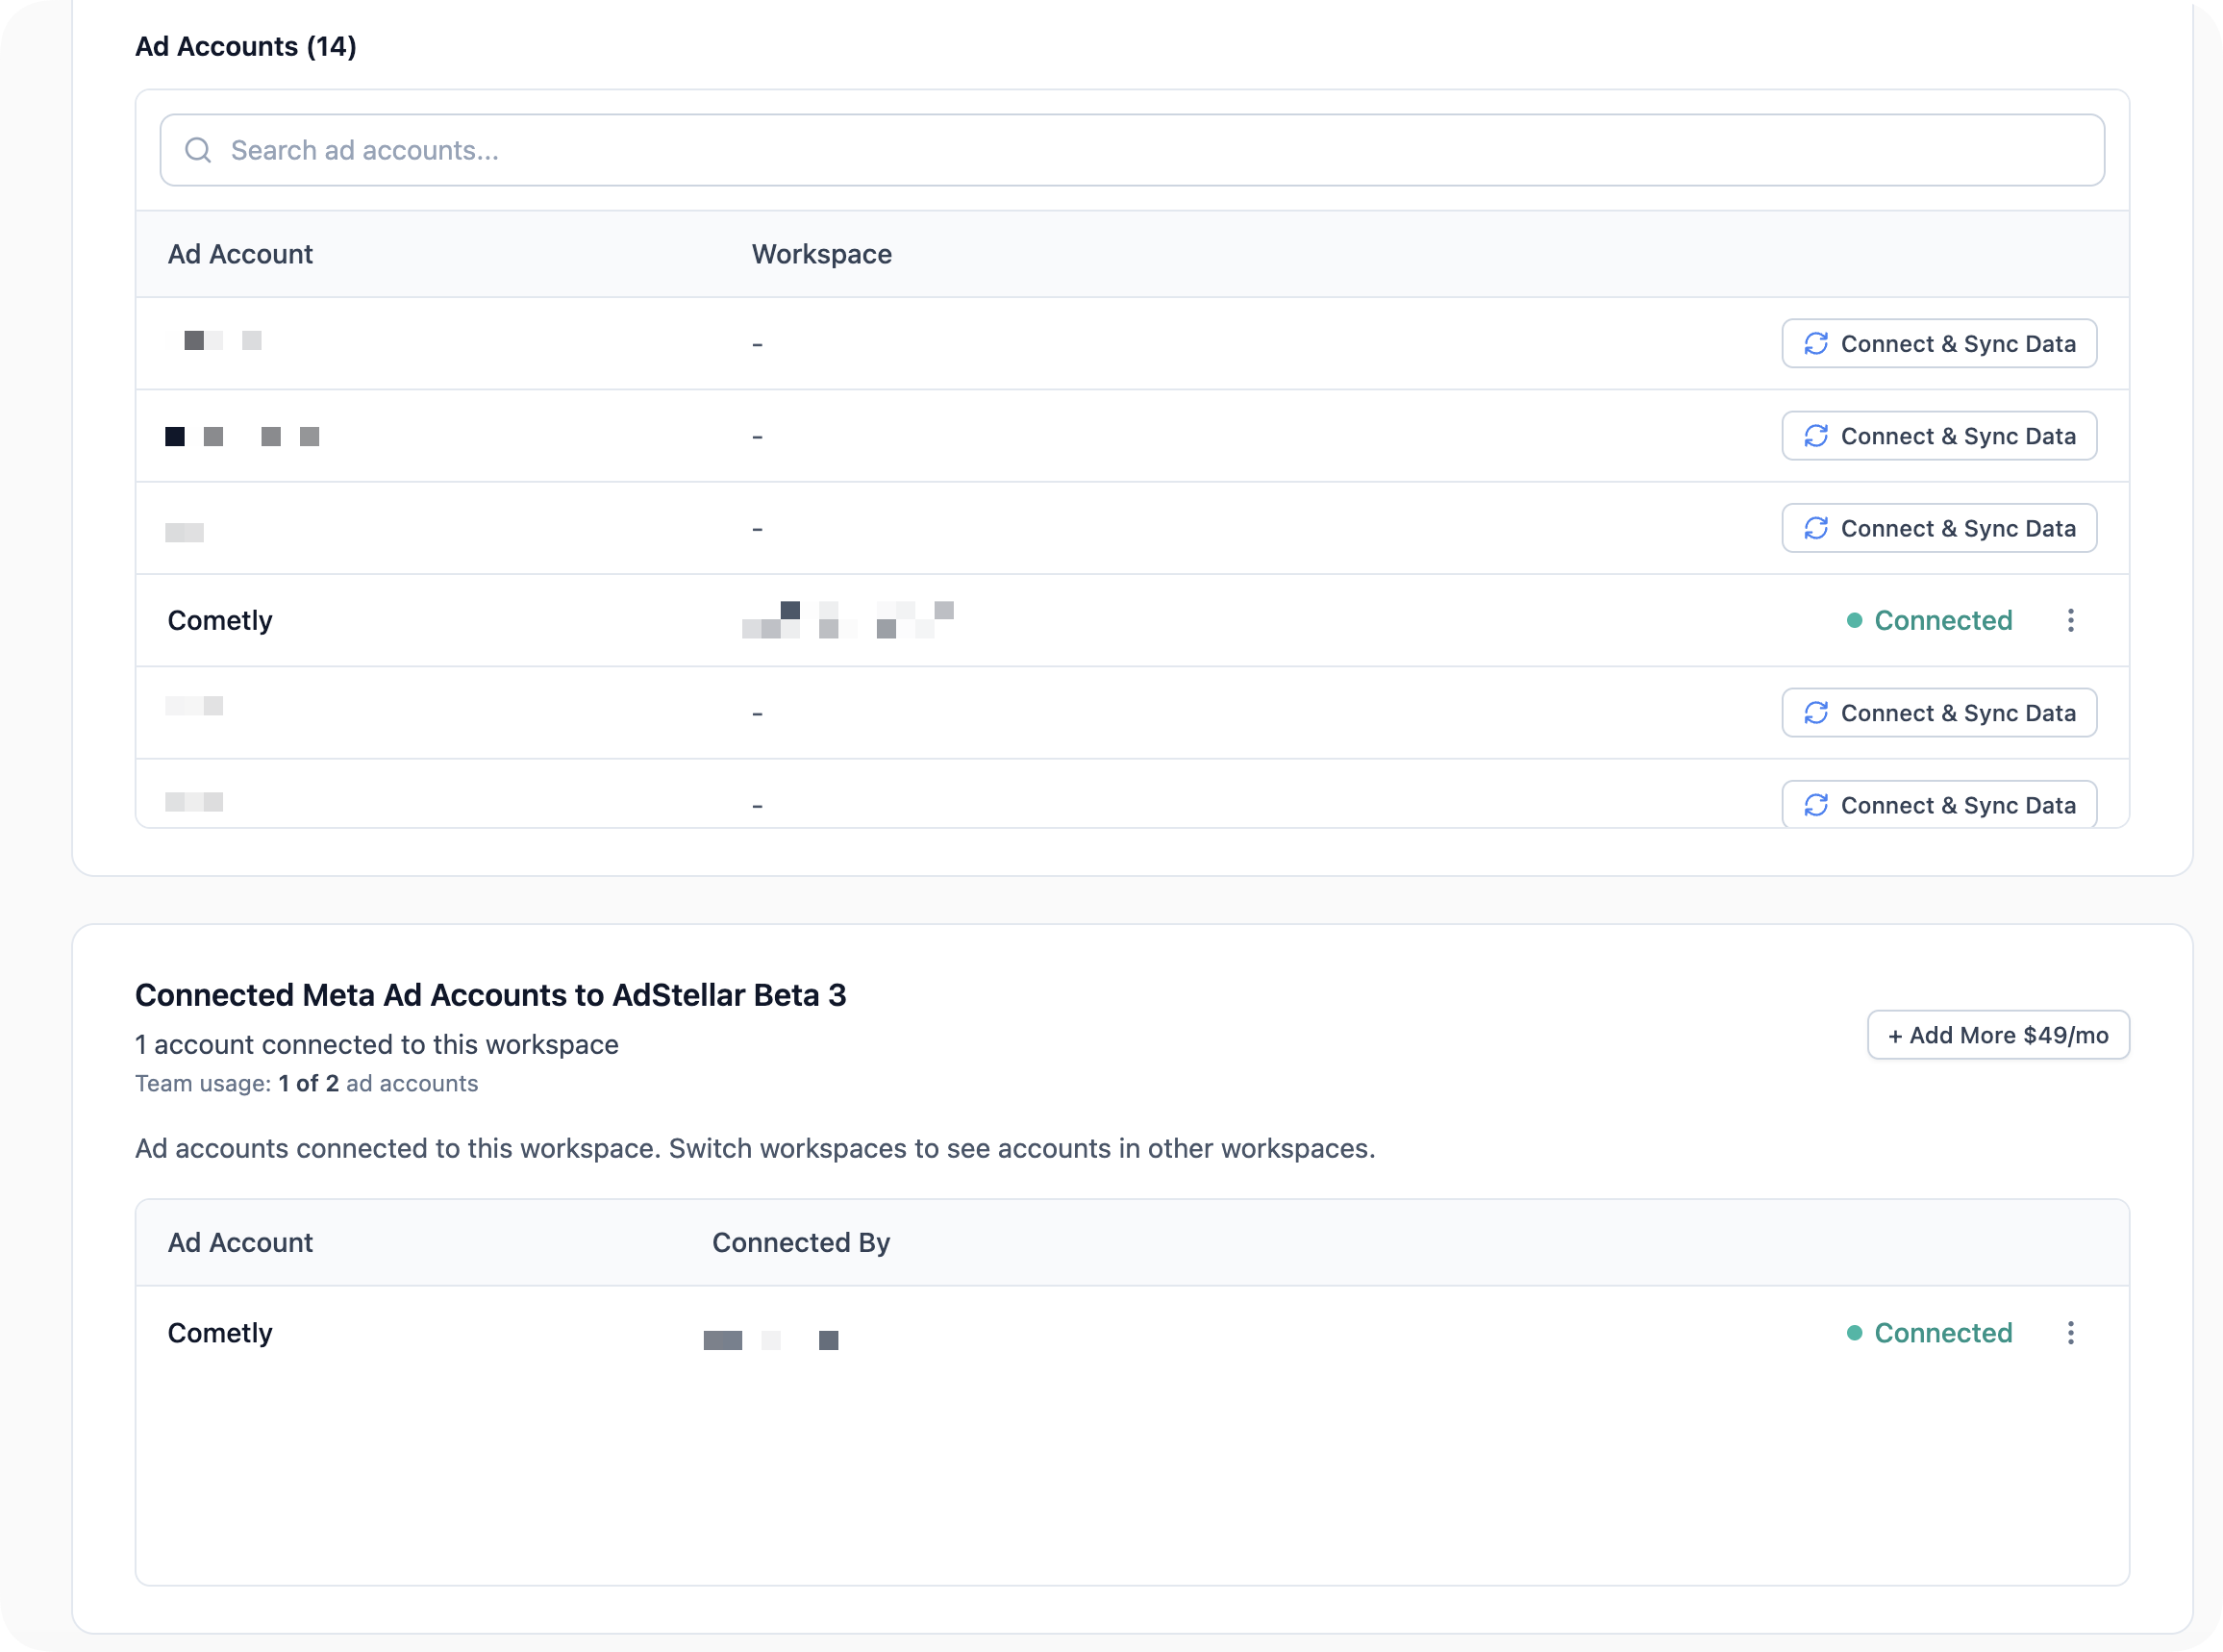
Ad accounts
You can connect unlimited ad accounts on every plan, at no extra cost — connect as many as you manage.If you don’t see your ad account
If an ad account is missing from the list:- Ensure you have Admin or Advertiser access inside Meta Business Manager
- Click Resync to refresh your ad account list
- Confirm the ad account is active and not disabled by Meta
- Ask the Business Manager owner to update your permissions if needed
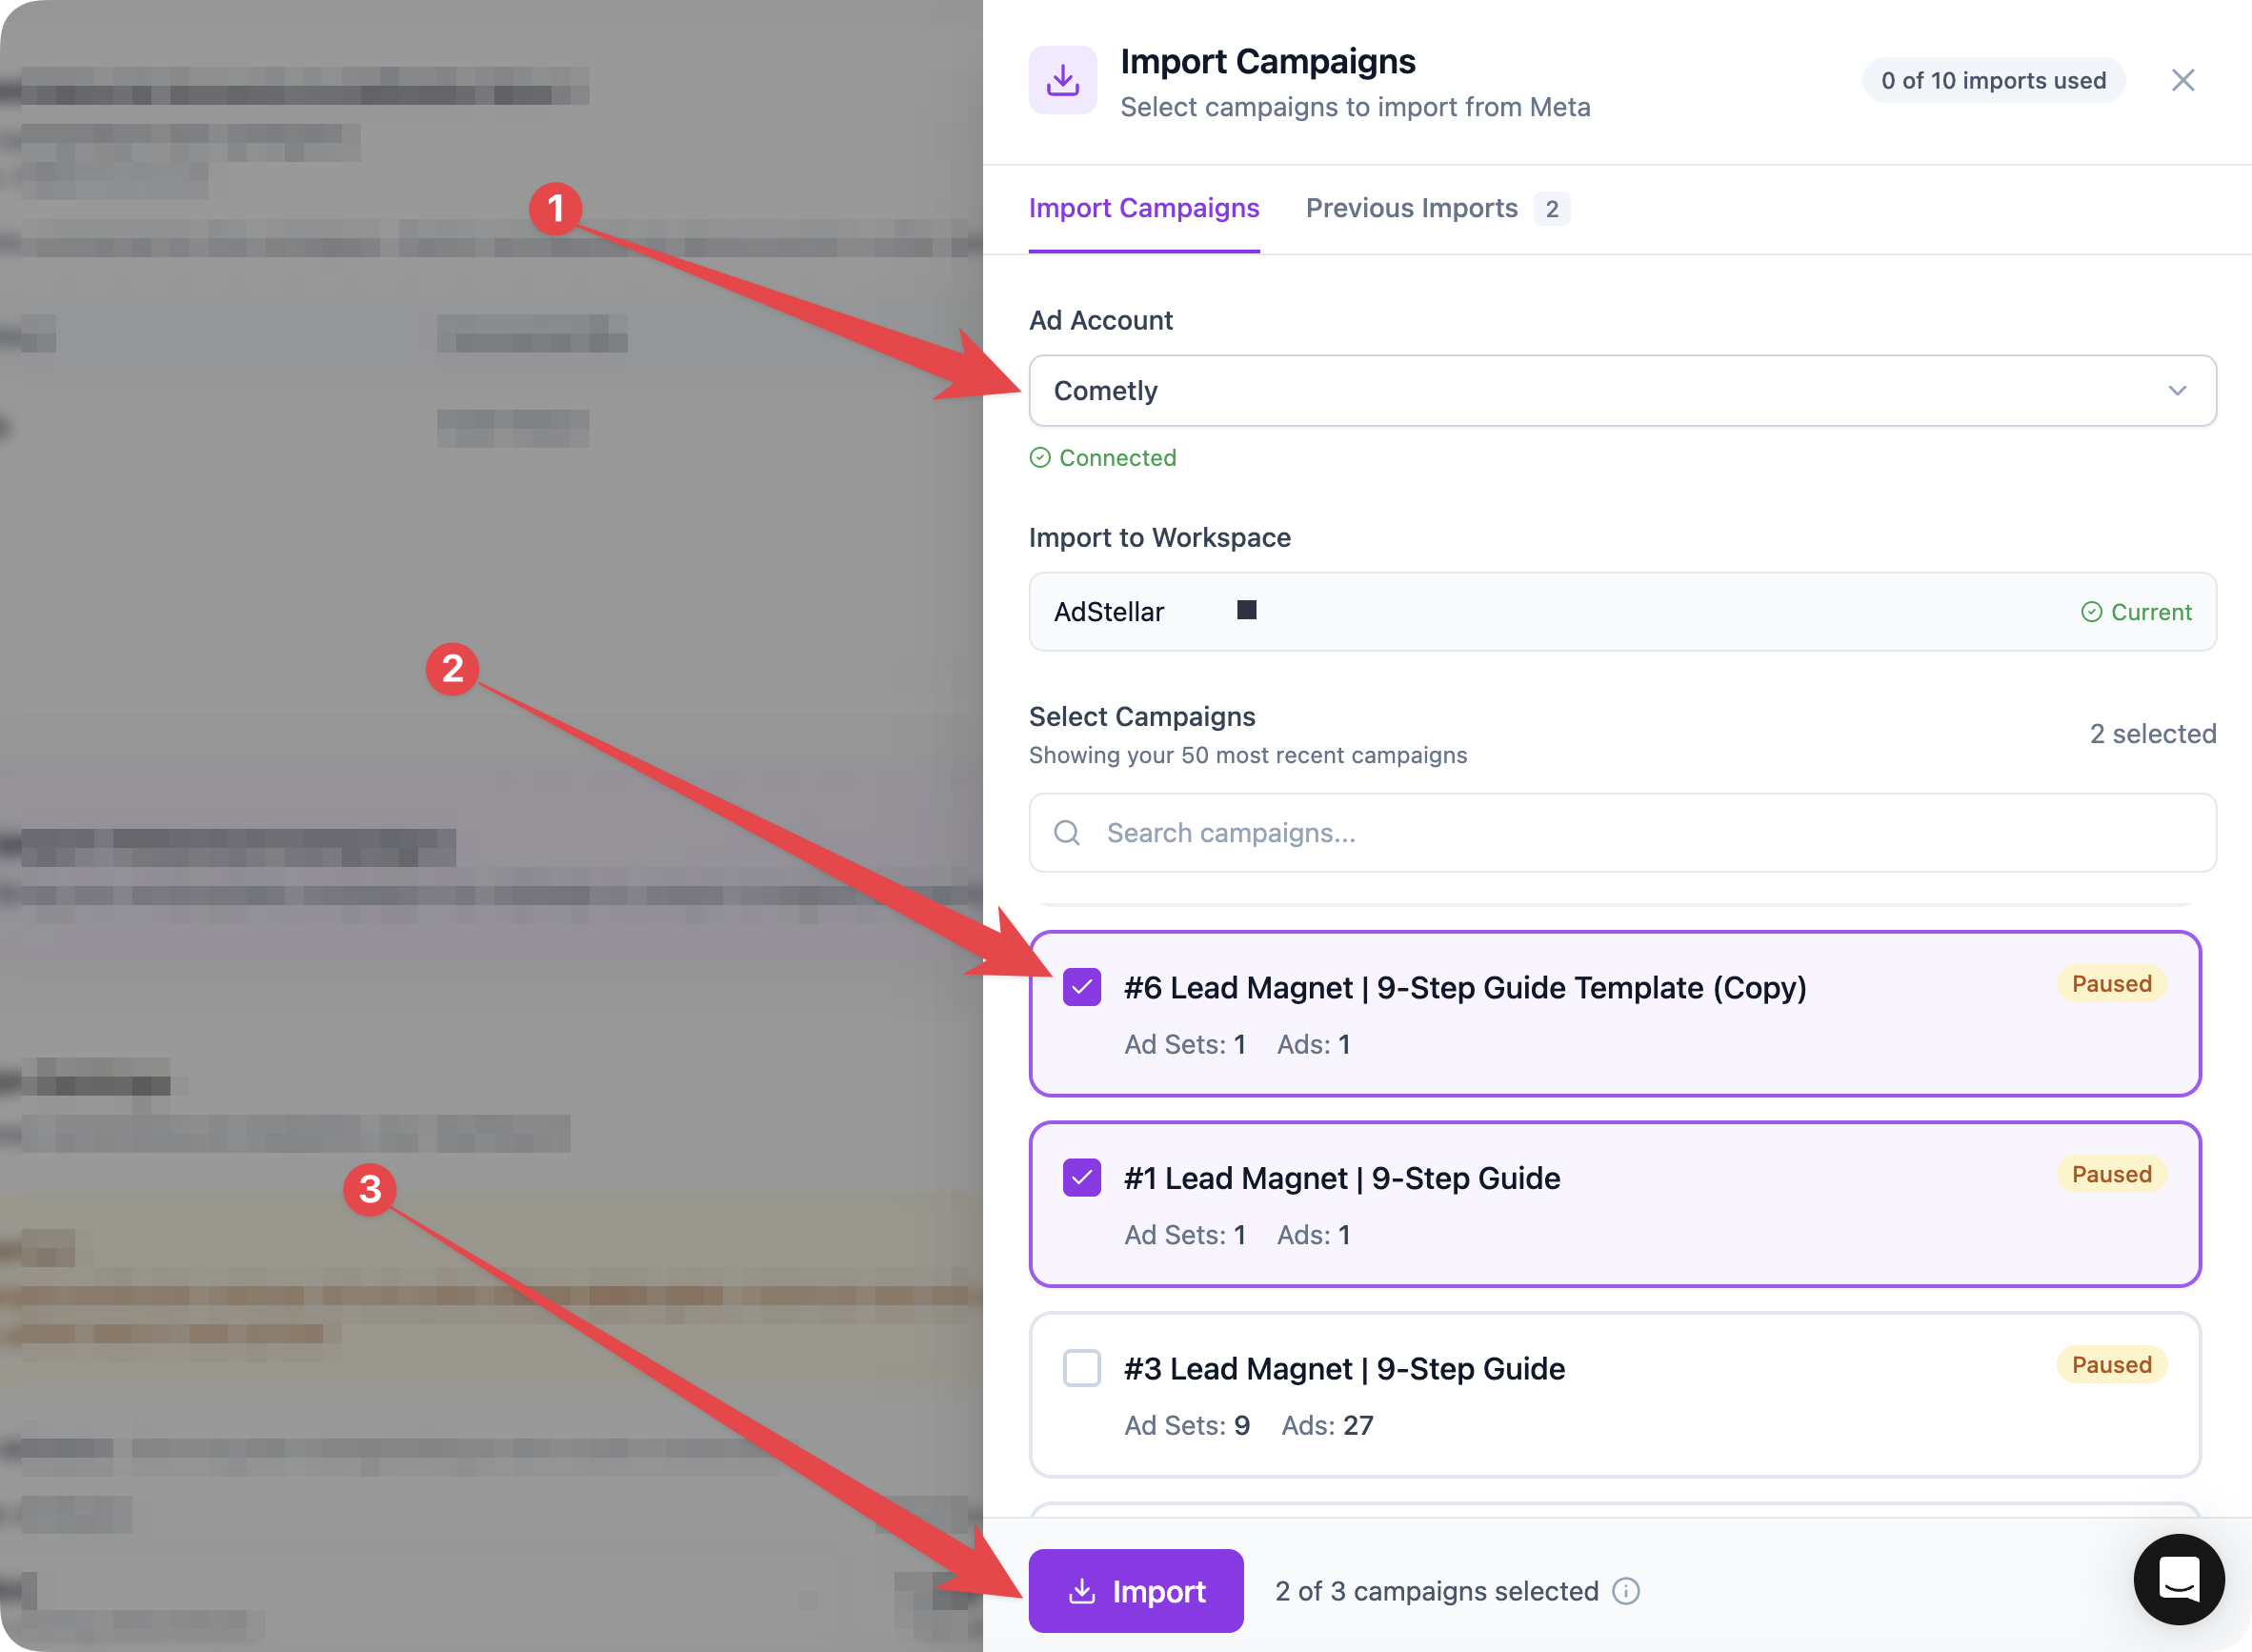
Step 3: Import Campaigns
Importing your historical Meta campaigns gives your AI engine more data to learn from, helping generate stronger ad recommendations and insights. This step is optional, but highly recommended. Importing your past campaigns allows AdStellar AI to learn from your historical performance, including your ad copy, headlines, audiences, and results, giving you stronger, more personalized AI recommendations.How to import
Open Integrations and select the Meta integration
Click Import Campaigns
Select the campaigns you want to import
Choose your date range
Click Import
Why import?
- AI learns from your past creative performance
- You unlock Creative Leaderboards and breakdowns
- You get a centralized performance history inside AdStellar AI
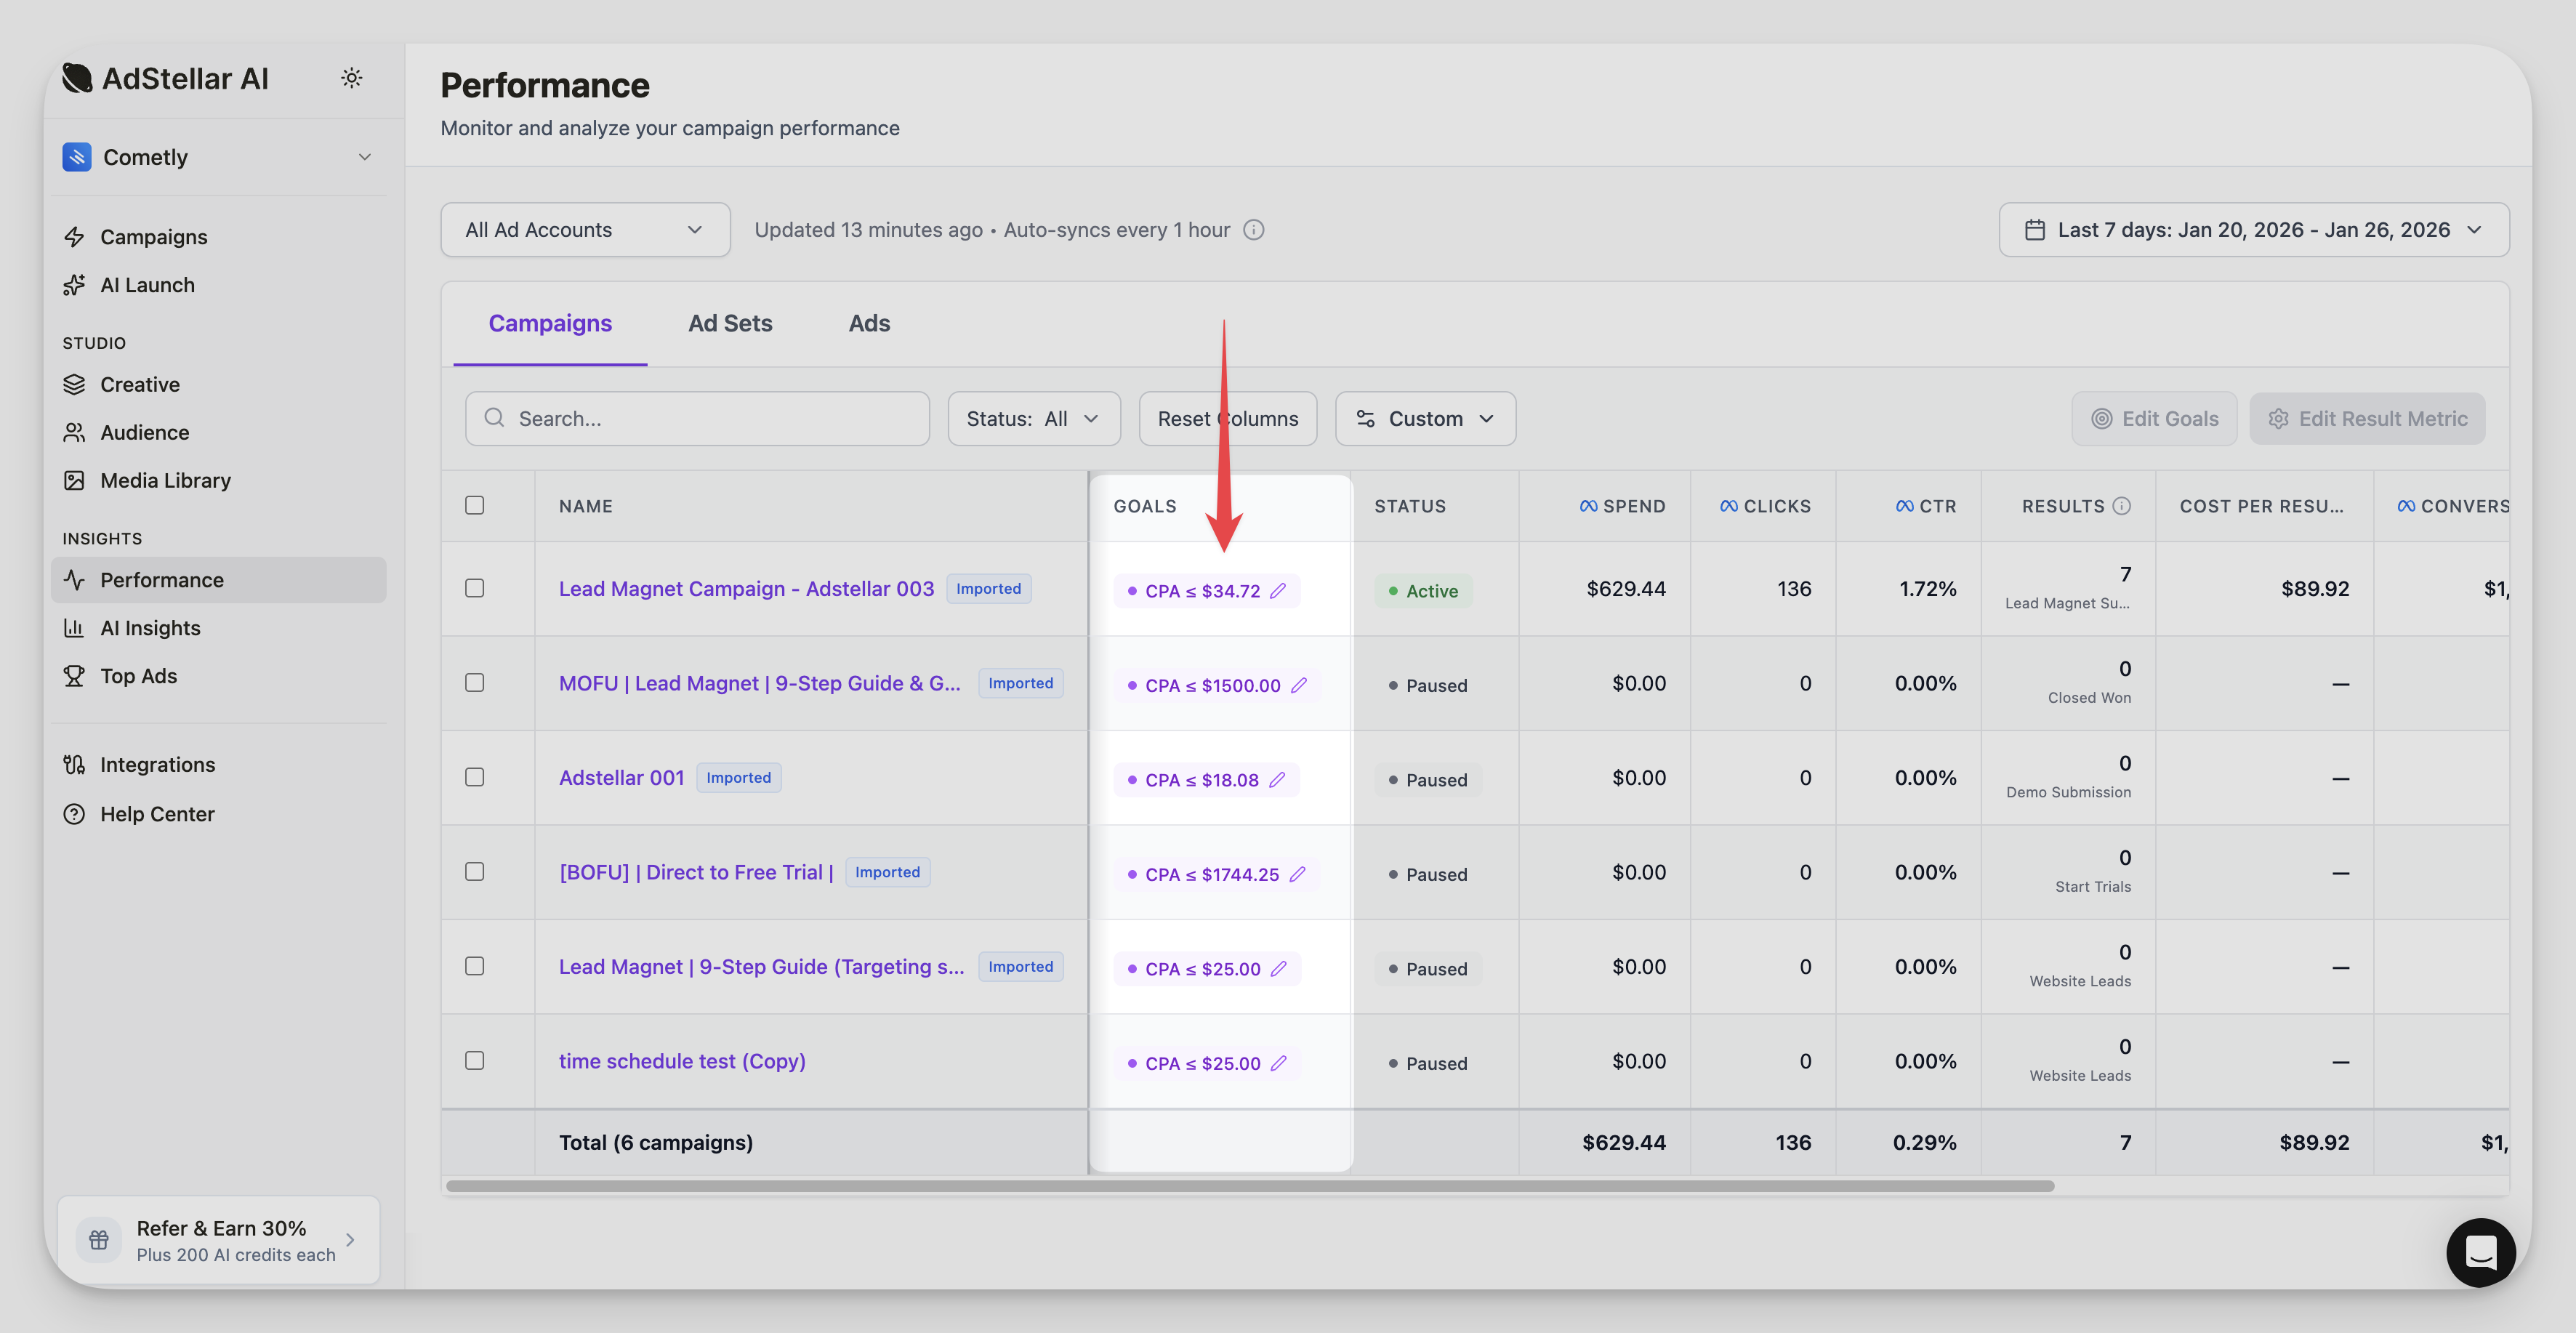
Step 4: Set Campaign Goals
This step is critical. Goals tell the AI what success looks like for your campaigns.Navigate to the Setup page
Click Set Goals next to a campaign
Choose your optimization metric (e.g., CPA, ROAS)
Enter your target value
Set your budget parameters
Click Save
Step 5: Launch Your First AI Campaign
Once Setup steps 1-3 are complete, you are ready to launch your first campaign using the AI Campaign Builder.How to launch
Navigate to the AI Builder
Select your ad account
Configure your campaign settings
Add your creatives, copy, and audiences
Review the AI-generated combinations
Click Launch
What the AI does for you
- Builds audiences based on your inputs
- Creates multiple ad variations
- Suggests high-performing creative combinations
- Structures ad sets for maximum testing
- Speeds up launching from hours to minutes
AI Credits
AI credits are the usage currency for AdStellar’s AI-powered features. Credits are consumed when you generate images, videos, or launch AI-built campaigns.- Only AI-generated content uses credits.
- Manually created campaigns do not use credits.
Common credit costs
Credit costs vary by model. Here are the most common defaults:Setup Complete
Once you finish all steps, your Setup checklist will show 100% complete. From here, you can:- Launch new AI campaigns anytime
- Explore Performance Insights
- Add team members
- Connect additional ad accounts
- Manage your billing and AI credits
- Import more campaigns
Navigating Your Workspace
FAQs
Can I connect multiple ad accounts?
Yes. You can connect unlimited ad accounts on every plan, at no extra cost.Do I have to import campaigns?
No. Importing is optional, but recommended for stronger AI output and better insights.Can I invite team members?
Yes. Invite unlimited collaborators from your workspace menu (top-left) → Team Members, at no extra cost.Can I change my plan later?
Yes. You can upgrade or downgrade from Billing & Subscription at any time.What if I need help during setup?
You can reach us anytime:- Click the in-app chat icon
- Email support@adstellar.ai
Next Steps
Now that you’re set up, here are a few powerful features to try:- Explore the AI Campaign Builder to create your first AI-powered campaign
- Review your Performance Insights and analytics dashboards
- Set up Creative Leaderboards to track your top-performing ads
- Invite your team members to collaborate on campaigns
- Connect additional ad accounts to manage more brands
- Connect Slack to use the Agent right from your team’s channels — see Use the Agent in Slack