> ## Documentation Index
> Fetch the complete documentation index at: https://docs.adstellar.ai/llms.txt
> Use this file to discover all available pages before exploring further.
# Manual Bulk Ad Launcher
> How to launch Meta ad tests in bulk manually using AdStellar
The bulk ad launcher lets you build and launch dozens of ad variations to Meta in minutes. This guide walks you through creating campaigns with multiple audience and creative variants, eliminating the tedious duplication work you'd normally do in Ads Manager.
## Getting Started
Navigate to **Campaigns** in the left menu. This is where you'll see:
* **Drafts** for campaigns in progress
* **AI Launch** for AI-generated campaigns (covered in the next guide)
* **Templates** for saved configurations
* **Launches** for campaigns published to Meta
Click **Start a New Campaign** to open the campaign builder.
## Campaign Level Settings
### Basic Configuration
Choose the ad account you want to publish to from the dropdown at the top.
Pick your objective: Sales, Leads, or Traffic.
Enter a campaign name or use naming tokens for automatic naming.
Choose between Campaign Budget Optimization (CBO) or ad set-level budgets and set the amount.
## Ad Set Level: Building Audience Variants
This is where AdStellar's bulk capabilities really shine.
### Basic Ad Set Setup
Enter a name or use naming tokens for automatic naming.
Set the daily or lifetime budget and your start/end dates.
Add the geographic locations you want to target.
Set age, gender, and detailed targeting options like interests and behaviors.
## Creating Audiences with the Winners Hub
When building audiences, click into the **Winners Hub** to see performance data from your imported campaigns. This shows you exactly what has worked before:
**Locations:** See spend, clicks, results, and cost per result for each location you've used.
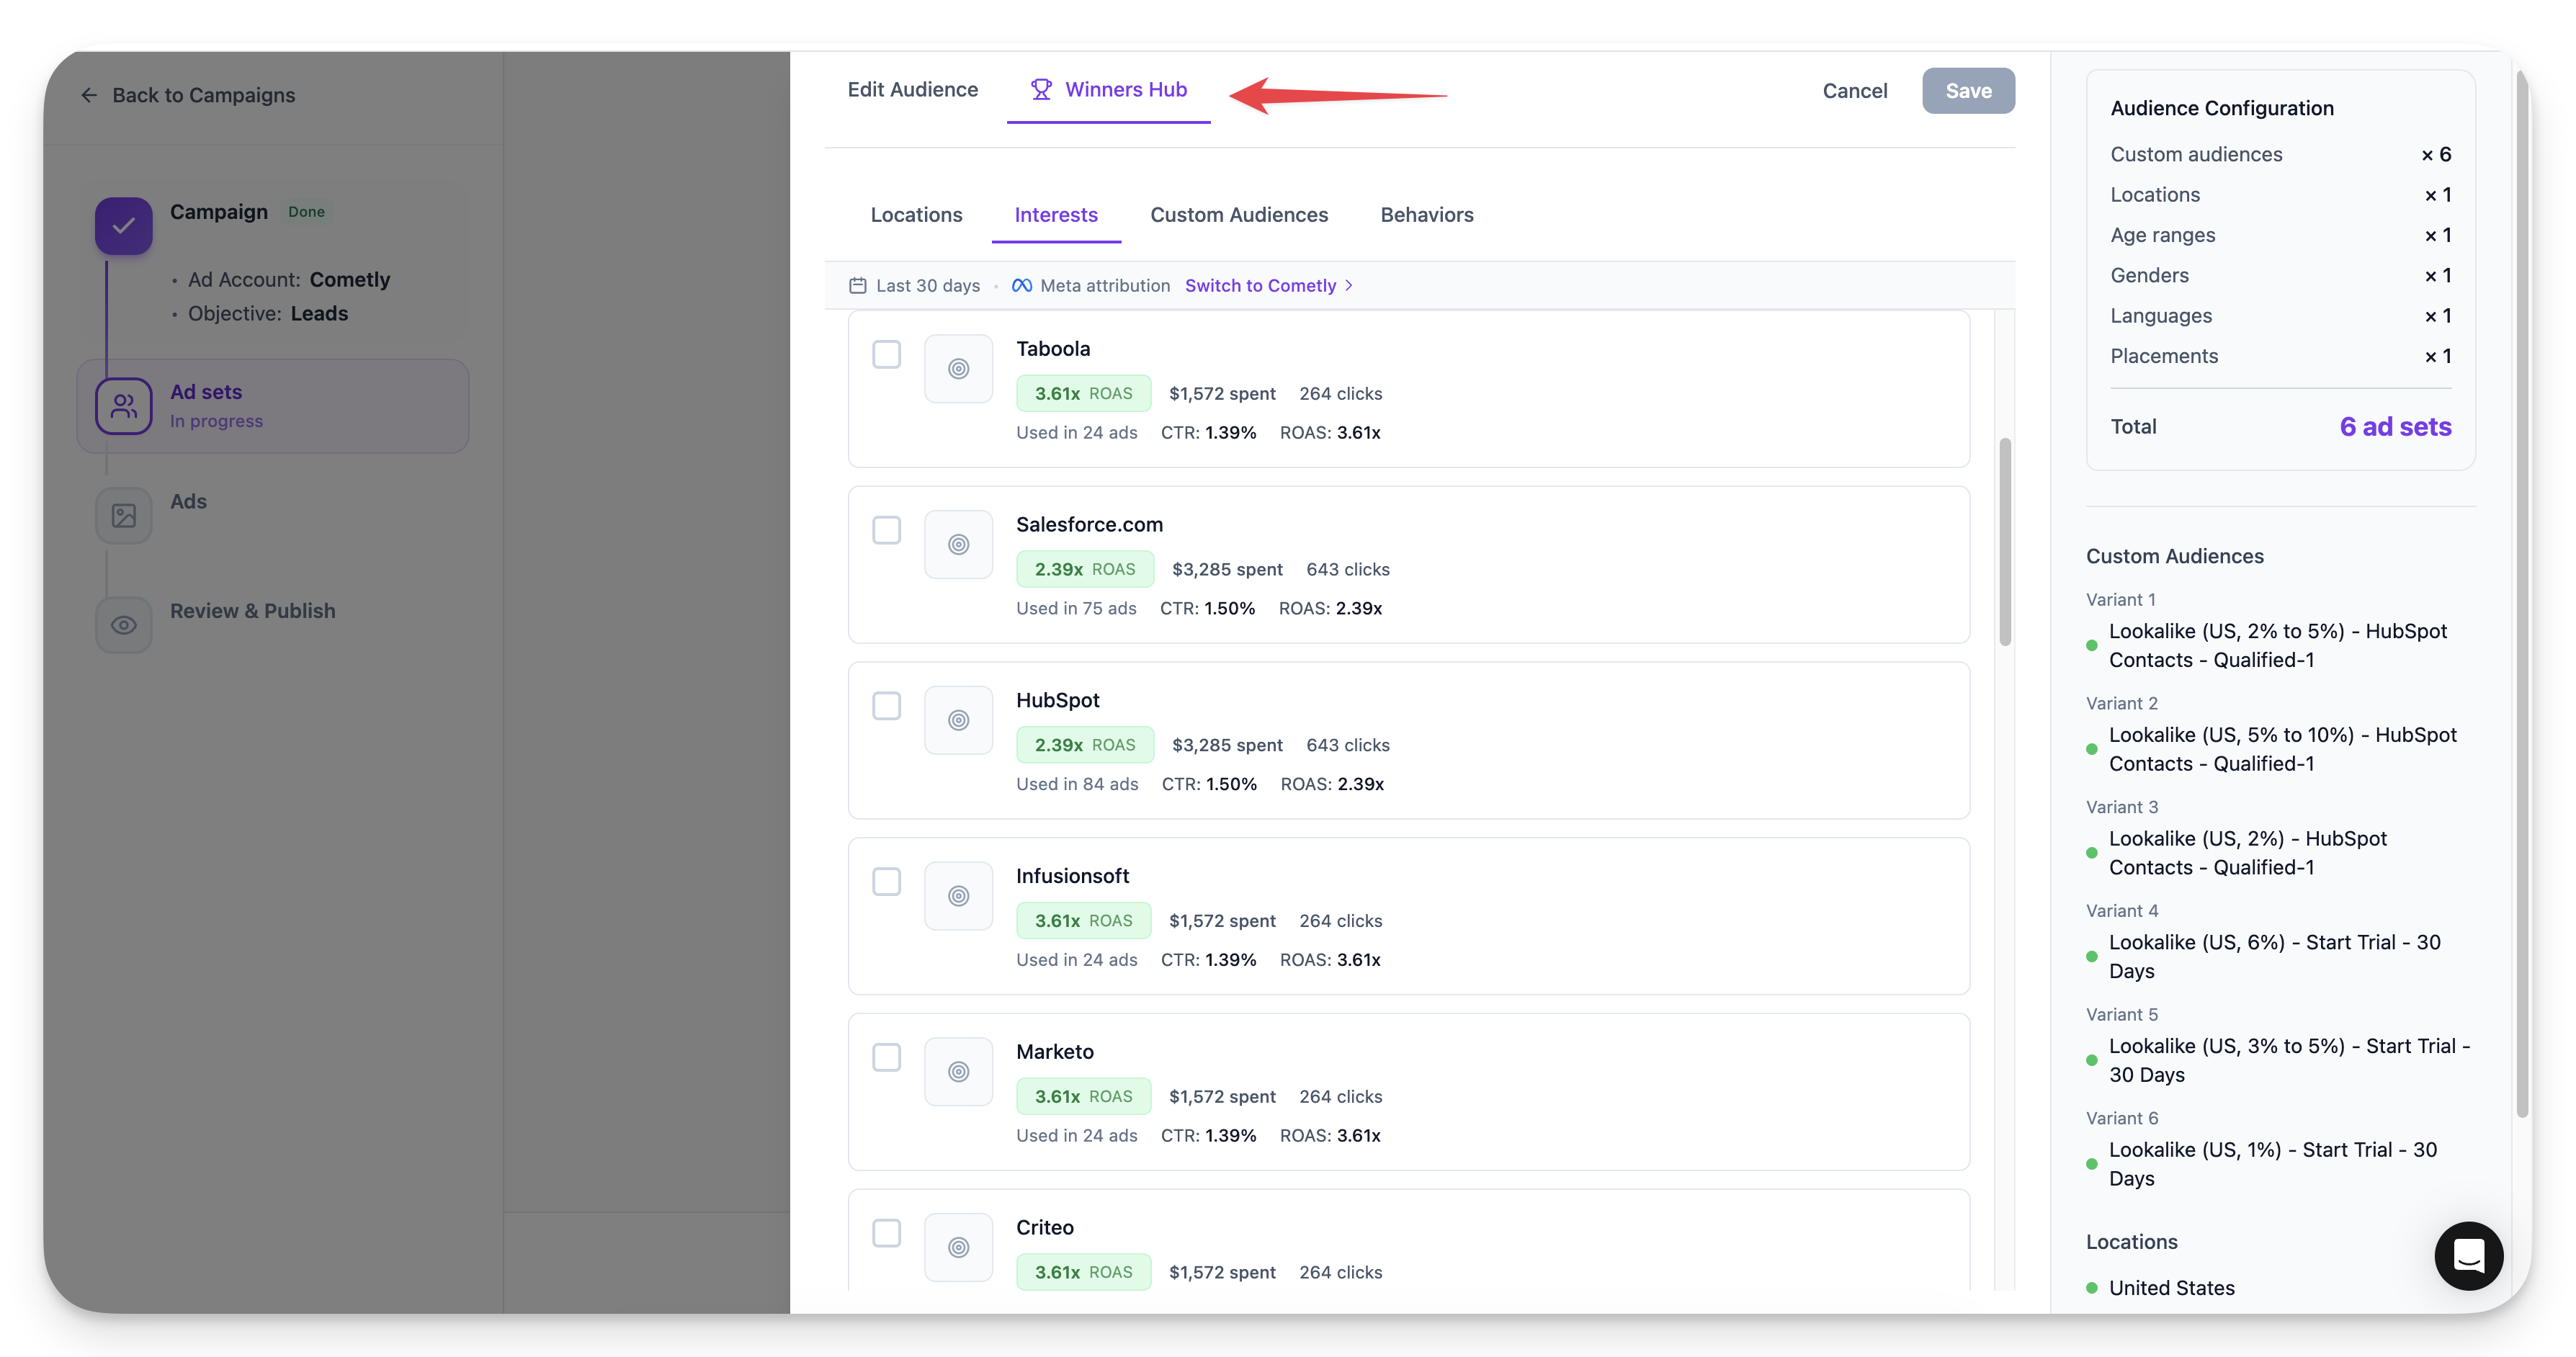 **Interests:** View which interest targeting has performed best (e.g., "Marketing Strategy" at $25 cost per result vs. "Mailchimp" at $35 cost per result).
**Custom Audiences:** Compare performance of your 1% lookalike vs. 5% lookalike audiences.
Select any element and click **Apply to Template** to add it to your current audience.
## The Power of Variants
Instead of duplicating ad sets manually in Meta, AdStellar lets you create variants that automatically multiply into separate ad sets.
### Example: Testing Three Interests
If you want to test three different interests in their own ad sets:
Set up your base audience with Interest A.
Click **Add Variant** and add Interest B to the new variant.
Click **Add Variant** again and add Interest C.
You now have 3 ad sets, one for each interest.
### Combining Multiple Variant Types
Variants multiply together:
* 2 custom audience variants x 3 detail targeting variants = 6 ad sets
* Add 2 age range variants and you get: 2 x 3 x 2 = 12 ad sets
This lets you launch comprehensive split tests without any manual duplication.
## Saving Audiences
Give your audience a name and click **Save**. You can reuse saved audiences in future campaigns or select multiple audiences to expand your tests further.
## Ad Level: Building Creative Variants
Click **Continue** to move to the ad level.
### Basic Ad Setup
Choose single image/video or carousel.
Select your Facebook Page (required) and optionally link an Instagram account.
Add your media, headline, primary text, description, and call to action.
### Creating Ads with the Winners Hub
You can start from a template (pulled from your imported campaigns) or create a new ad from scratch.
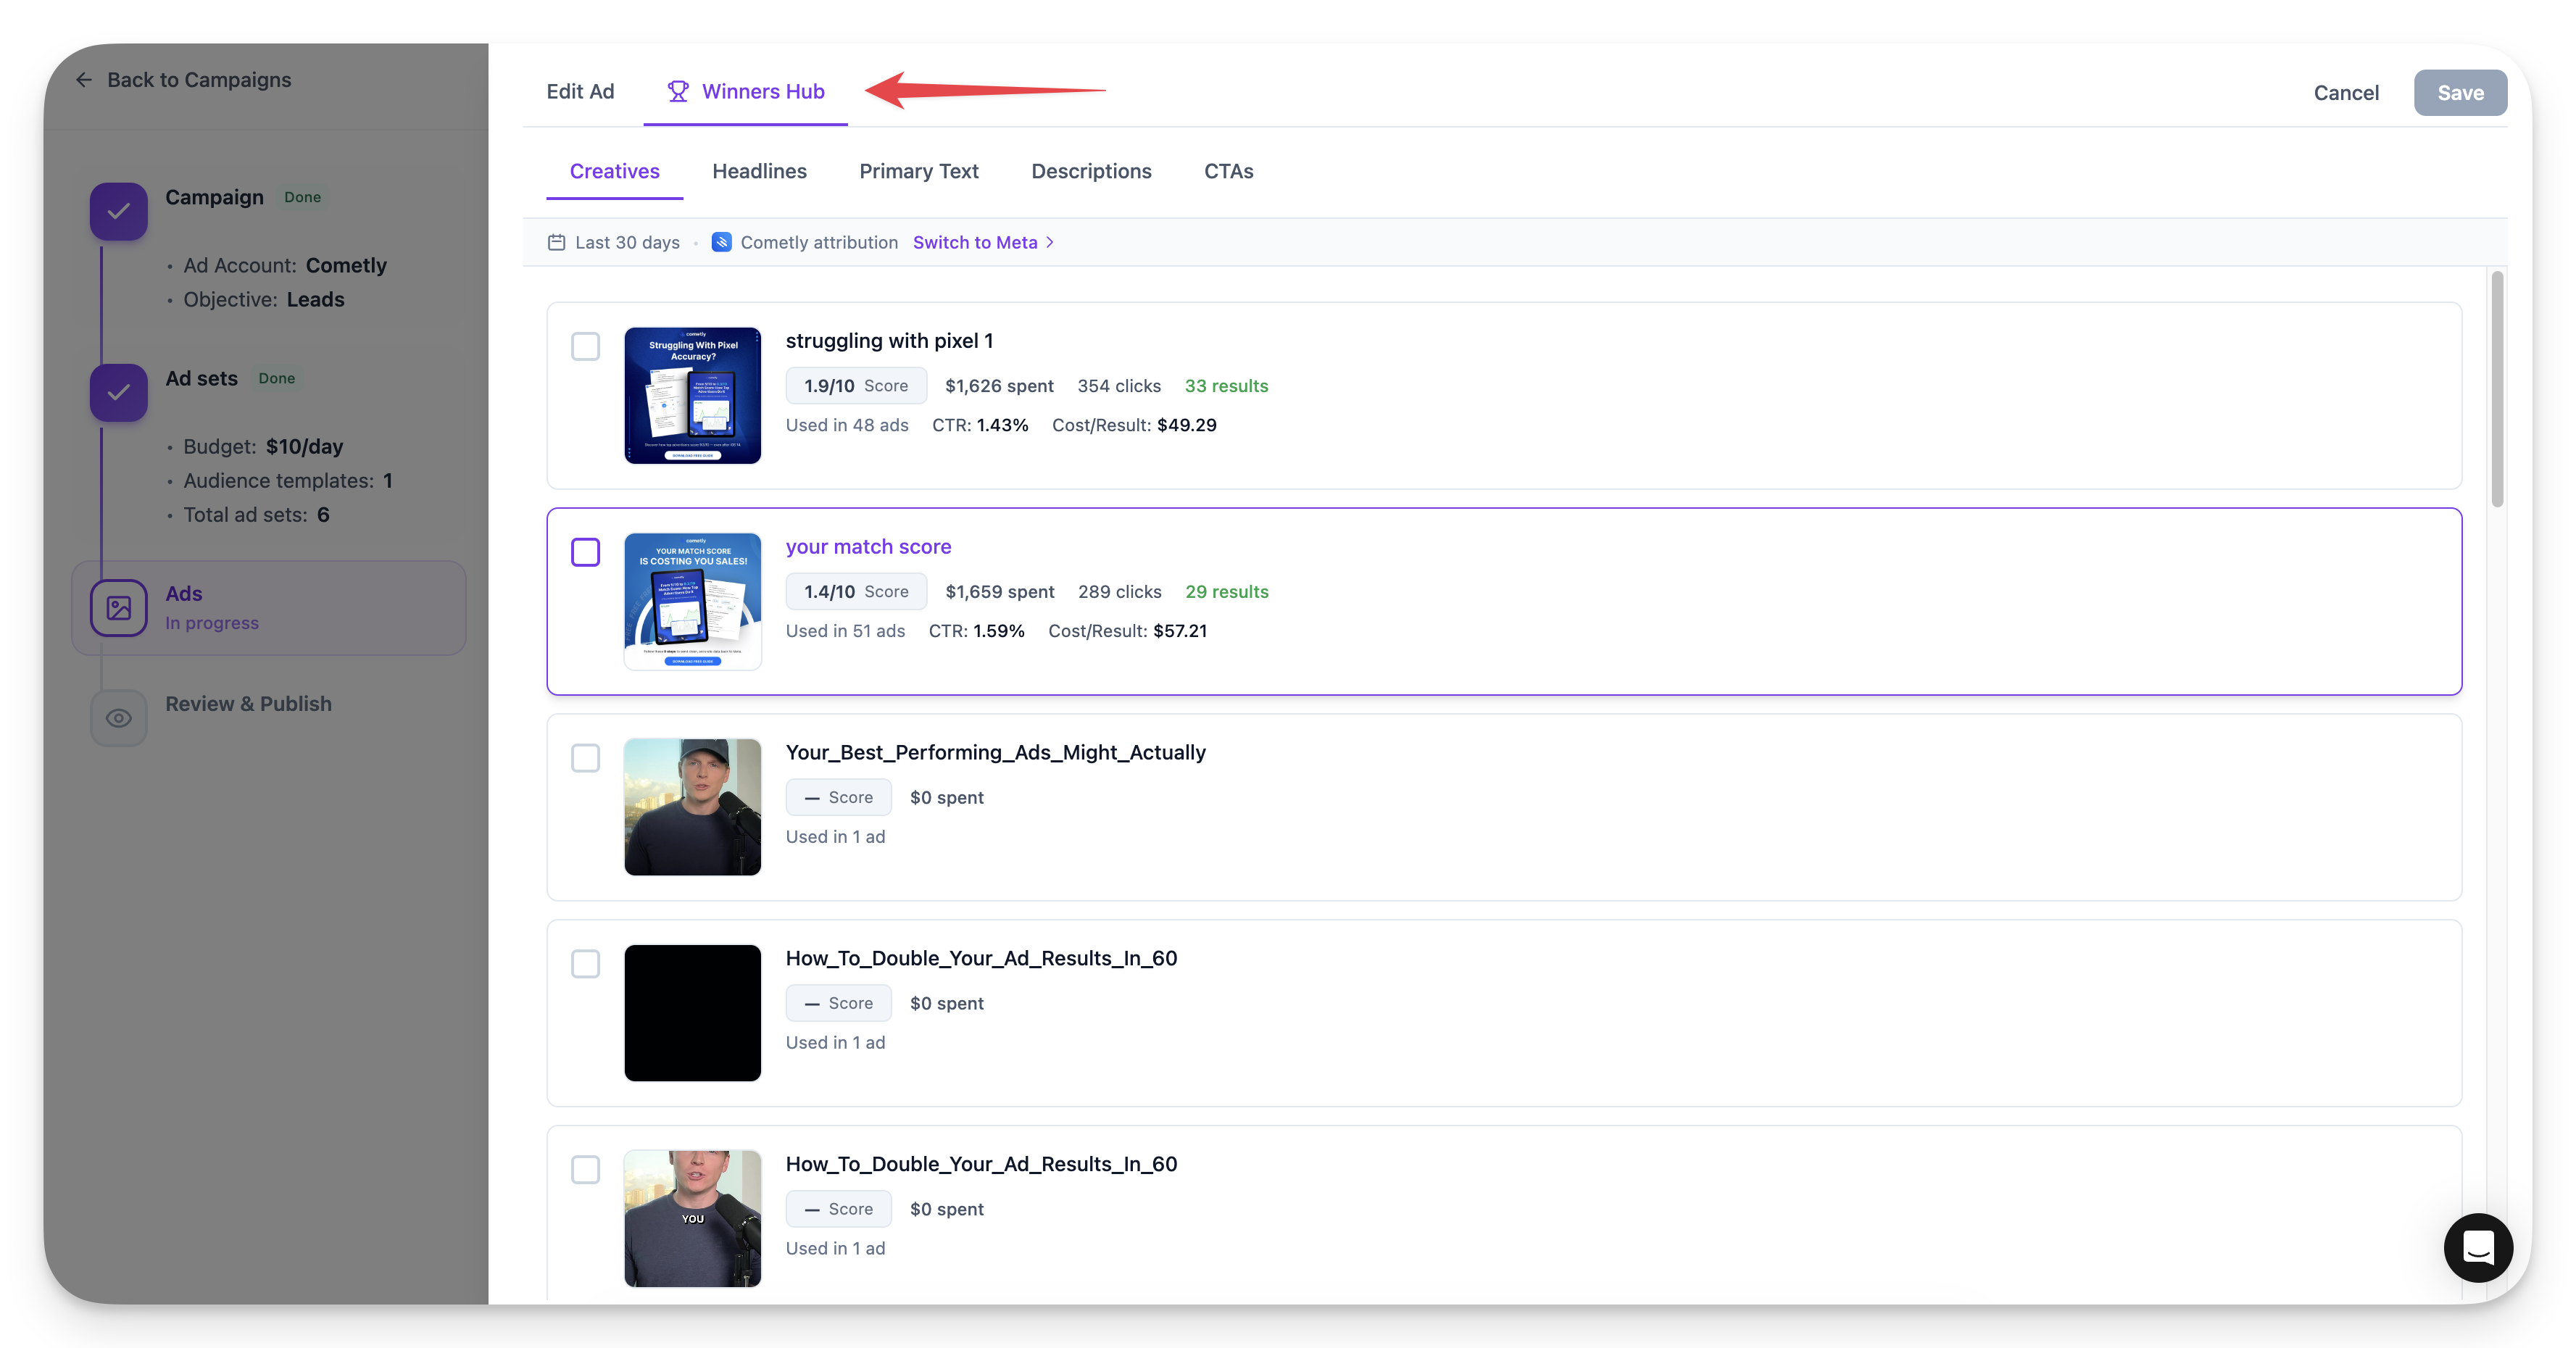
Click **Edit** on any template to customize it. The Winners Hub is available here too, showing performance data for:
* **Media assets** (images and videos)
* **Headlines**
* **Primary text**
Click any element to add it to your current ad.
**Interests:** View which interest targeting has performed best (e.g., "Marketing Strategy" at $25 cost per result vs. "Mailchimp" at $35 cost per result).
**Custom Audiences:** Compare performance of your 1% lookalike vs. 5% lookalike audiences.
Select any element and click **Apply to Template** to add it to your current audience.
## The Power of Variants
Instead of duplicating ad sets manually in Meta, AdStellar lets you create variants that automatically multiply into separate ad sets.
### Example: Testing Three Interests
If you want to test three different interests in their own ad sets:
Set up your base audience with Interest A.
Click **Add Variant** and add Interest B to the new variant.
Click **Add Variant** again and add Interest C.
You now have 3 ad sets, one for each interest.
### Combining Multiple Variant Types
Variants multiply together:
* 2 custom audience variants x 3 detail targeting variants = 6 ad sets
* Add 2 age range variants and you get: 2 x 3 x 2 = 12 ad sets
This lets you launch comprehensive split tests without any manual duplication.
## Saving Audiences
Give your audience a name and click **Save**. You can reuse saved audiences in future campaigns or select multiple audiences to expand your tests further.
## Ad Level: Building Creative Variants
Click **Continue** to move to the ad level.
### Basic Ad Setup
Choose single image/video or carousel.
Select your Facebook Page (required) and optionally link an Instagram account.
Add your media, headline, primary text, description, and call to action.
### Creating Ads with the Winners Hub
You can start from a template (pulled from your imported campaigns) or create a new ad from scratch.
Click **Edit** on any template to customize it. The Winners Hub is available here too, showing performance data for:
* **Media assets** (images and videos)
* **Headlines**
* **Primary text**
Click any element to add it to your current ad.
 ### Creative Variants
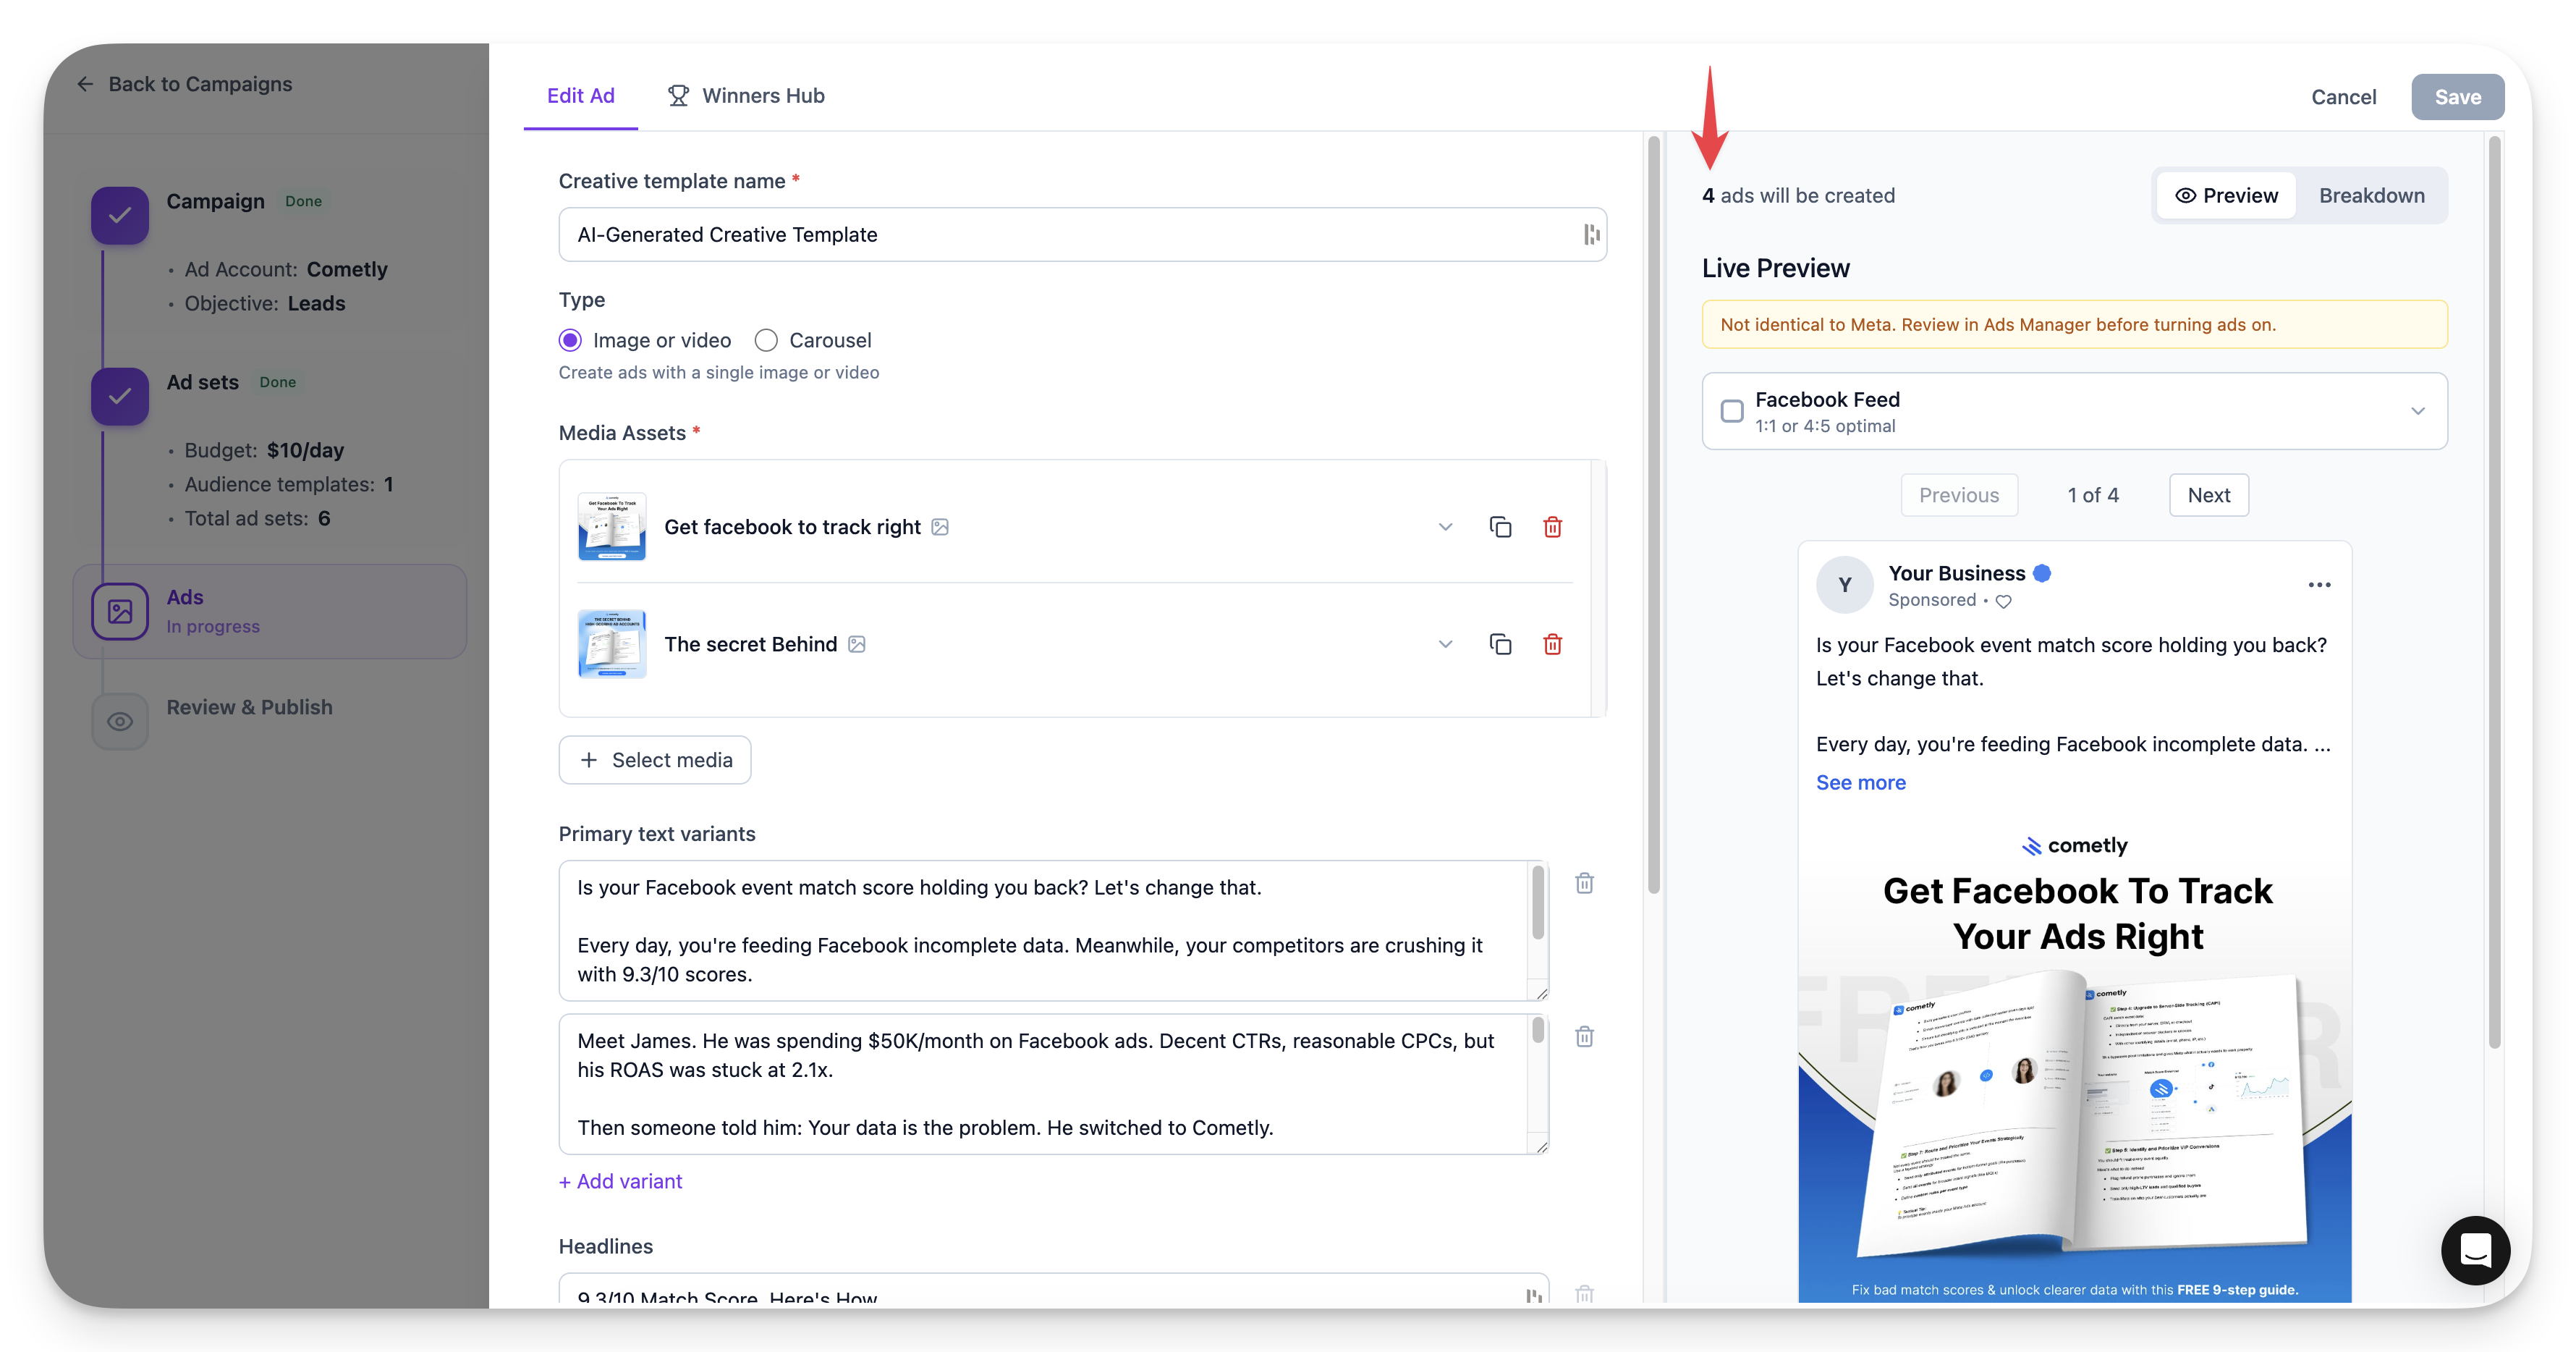
The variant system works the same way at the ad level:
**Example: Building 8 Ad Variations**
* 2 media assets (images or videos)
* 2 primary text variants
* 2 headline variants
* Result: 2 x 2 x 2 = 8 unique ad combinations
The breakdown in the top right shows you exactly how many ads will be created.
### Creative Variants
The variant system works the same way at the ad level:
**Example: Building 8 Ad Variations**
* 2 media assets (images or videos)
* 2 primary text variants
* 2 headline variants
* Result: 2 x 2 x 2 = 8 unique ad combinations
The breakdown in the top right shows you exactly how many ads will be created.
 ### UTM Parameters
Add UTM parameters for tracking. You can save parameter templates for reuse (useful if you're using tools like Cometly or other attribution platforms).
## Review and Publish
Click **Continue to Review** to see a summary of your campaign.
### Review Page Overview
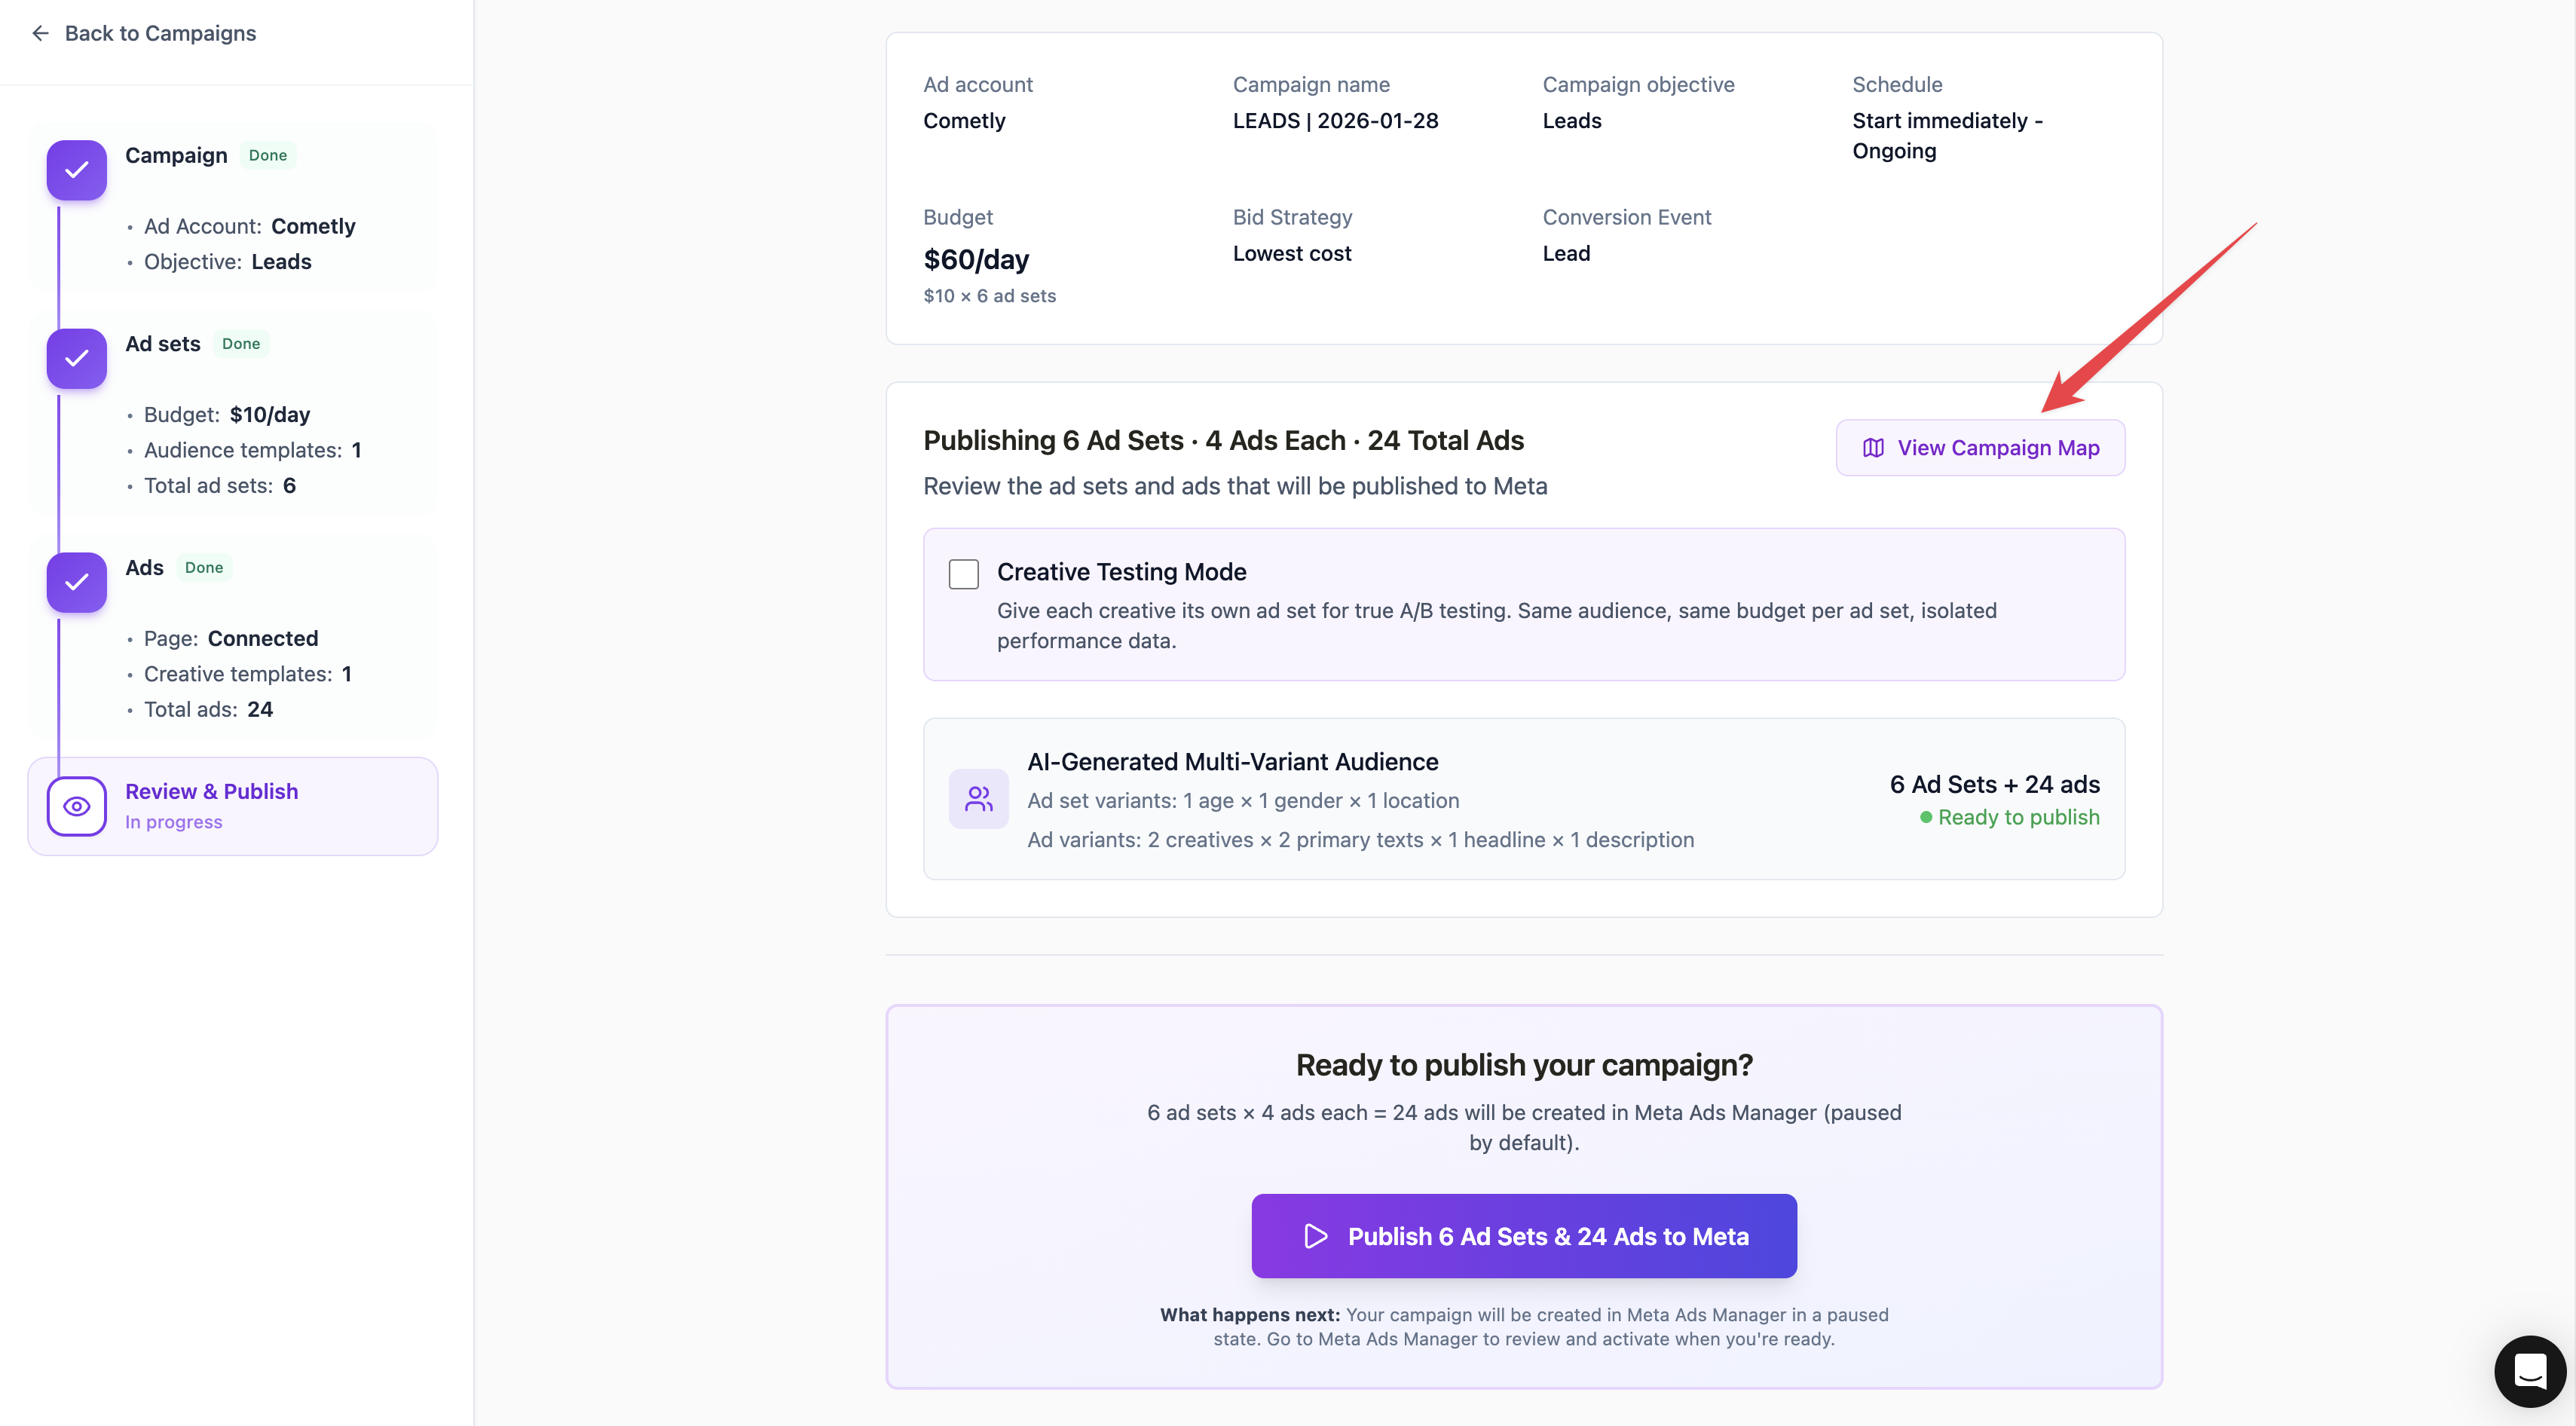
The review page shows:
* Total ad sets to be published
* Total ads per ad set
* Total ad variations (ad sets x ads)
* Any errors that need to be fixed before publishing
**Example:** 12 ad sets x 4 ads each = 48 total ad variations
### Campaign Map
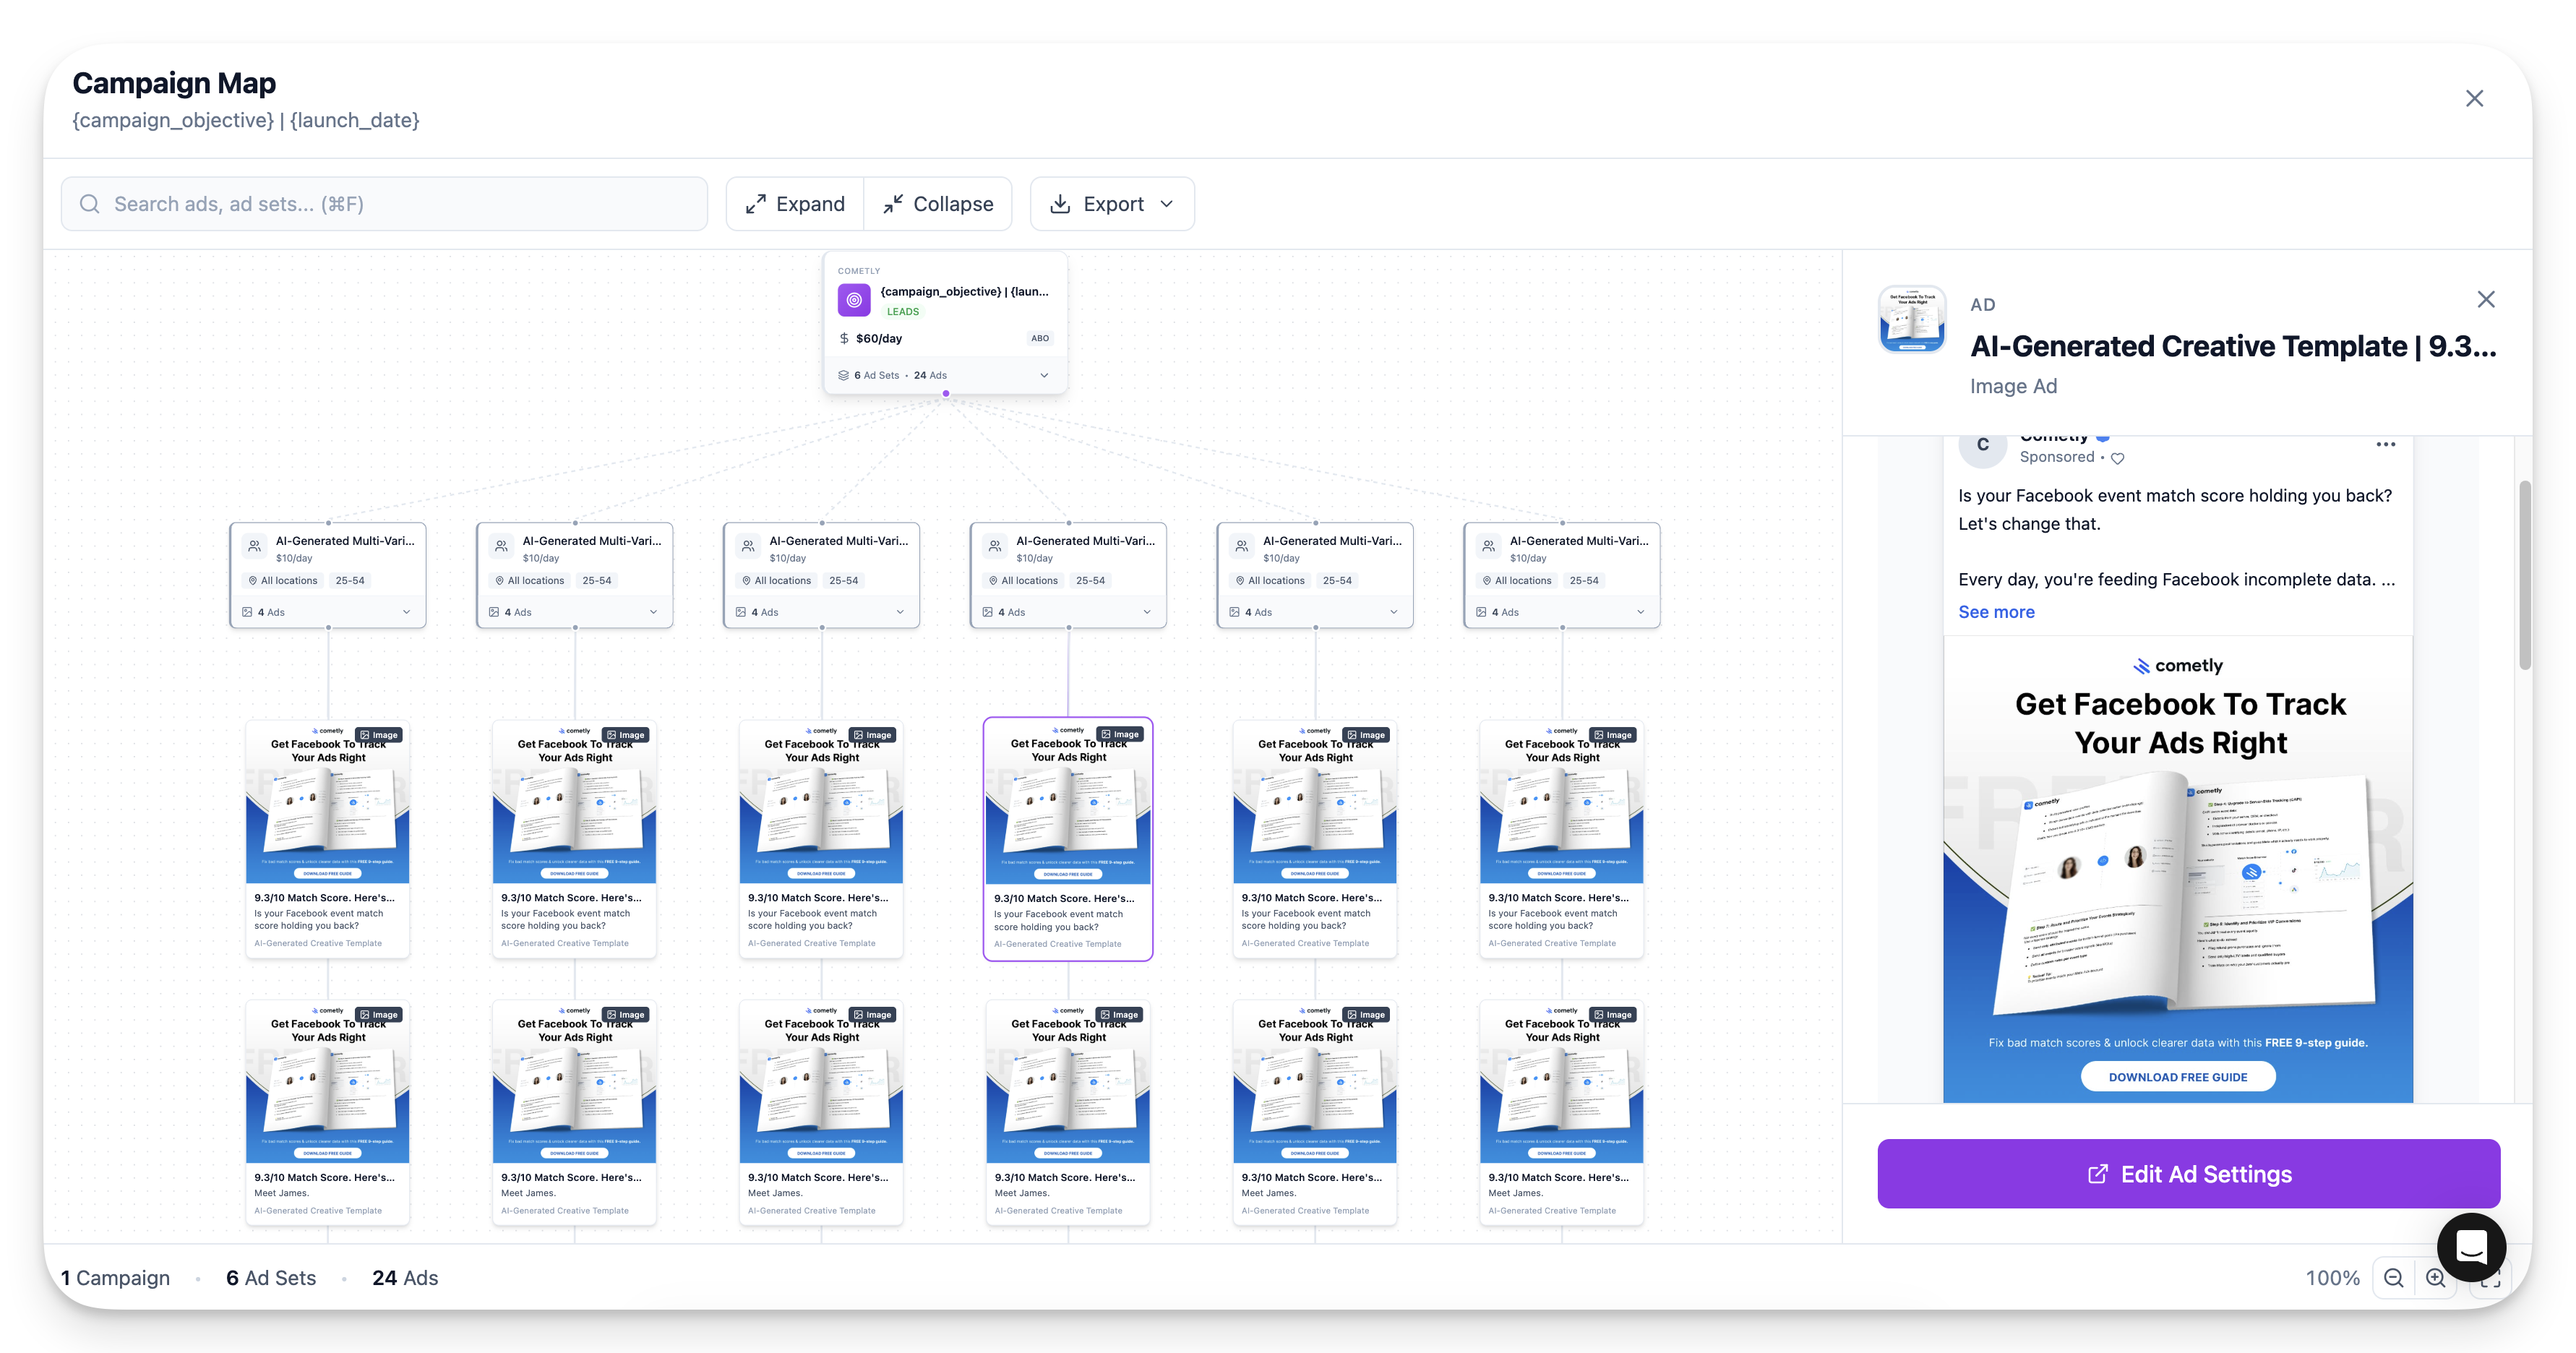
Click **Campaign Map** to visualize your entire campaign structure:
* See all ad sets at a glance
* Click into any ad set to see its targeting
* Click into any ad to preview the creative variation
This is especially helpful for large launches where you want to verify everything looks correct.
### UTM Parameters
Add UTM parameters for tracking. You can save parameter templates for reuse (useful if you're using tools like Cometly or other attribution platforms).
## Review and Publish
Click **Continue to Review** to see a summary of your campaign.
### Review Page Overview
The review page shows:
* Total ad sets to be published
* Total ads per ad set
* Total ad variations (ad sets x ads)
* Any errors that need to be fixed before publishing
**Example:** 12 ad sets x 4 ads each = 48 total ad variations
### Campaign Map
Click **Campaign Map** to visualize your entire campaign structure:
* See all ad sets at a glance
* Click into any ad set to see its targeting
* Click into any ad to preview the creative variation
This is especially helpful for large launches where you want to verify everything looks correct.
 ### Creative Testing Mode
Toggle on **Creative Testing Mode** to put each unique ad into its own separate ad set.
* **Without Creative Testing Mode:** 12 ad sets with 4 ads each (48 total ads)
* **With Creative Testing Mode:** 48 ad sets with 1 ad each
### Creative Testing Mode
Toggle on **Creative Testing Mode** to put each unique ad into its own separate ad set.
* **Without Creative Testing Mode:** 12 ad sets with 4 ads each (48 total ads)
* **With Creative Testing Mode:** 48 ad sets with 1 ad each
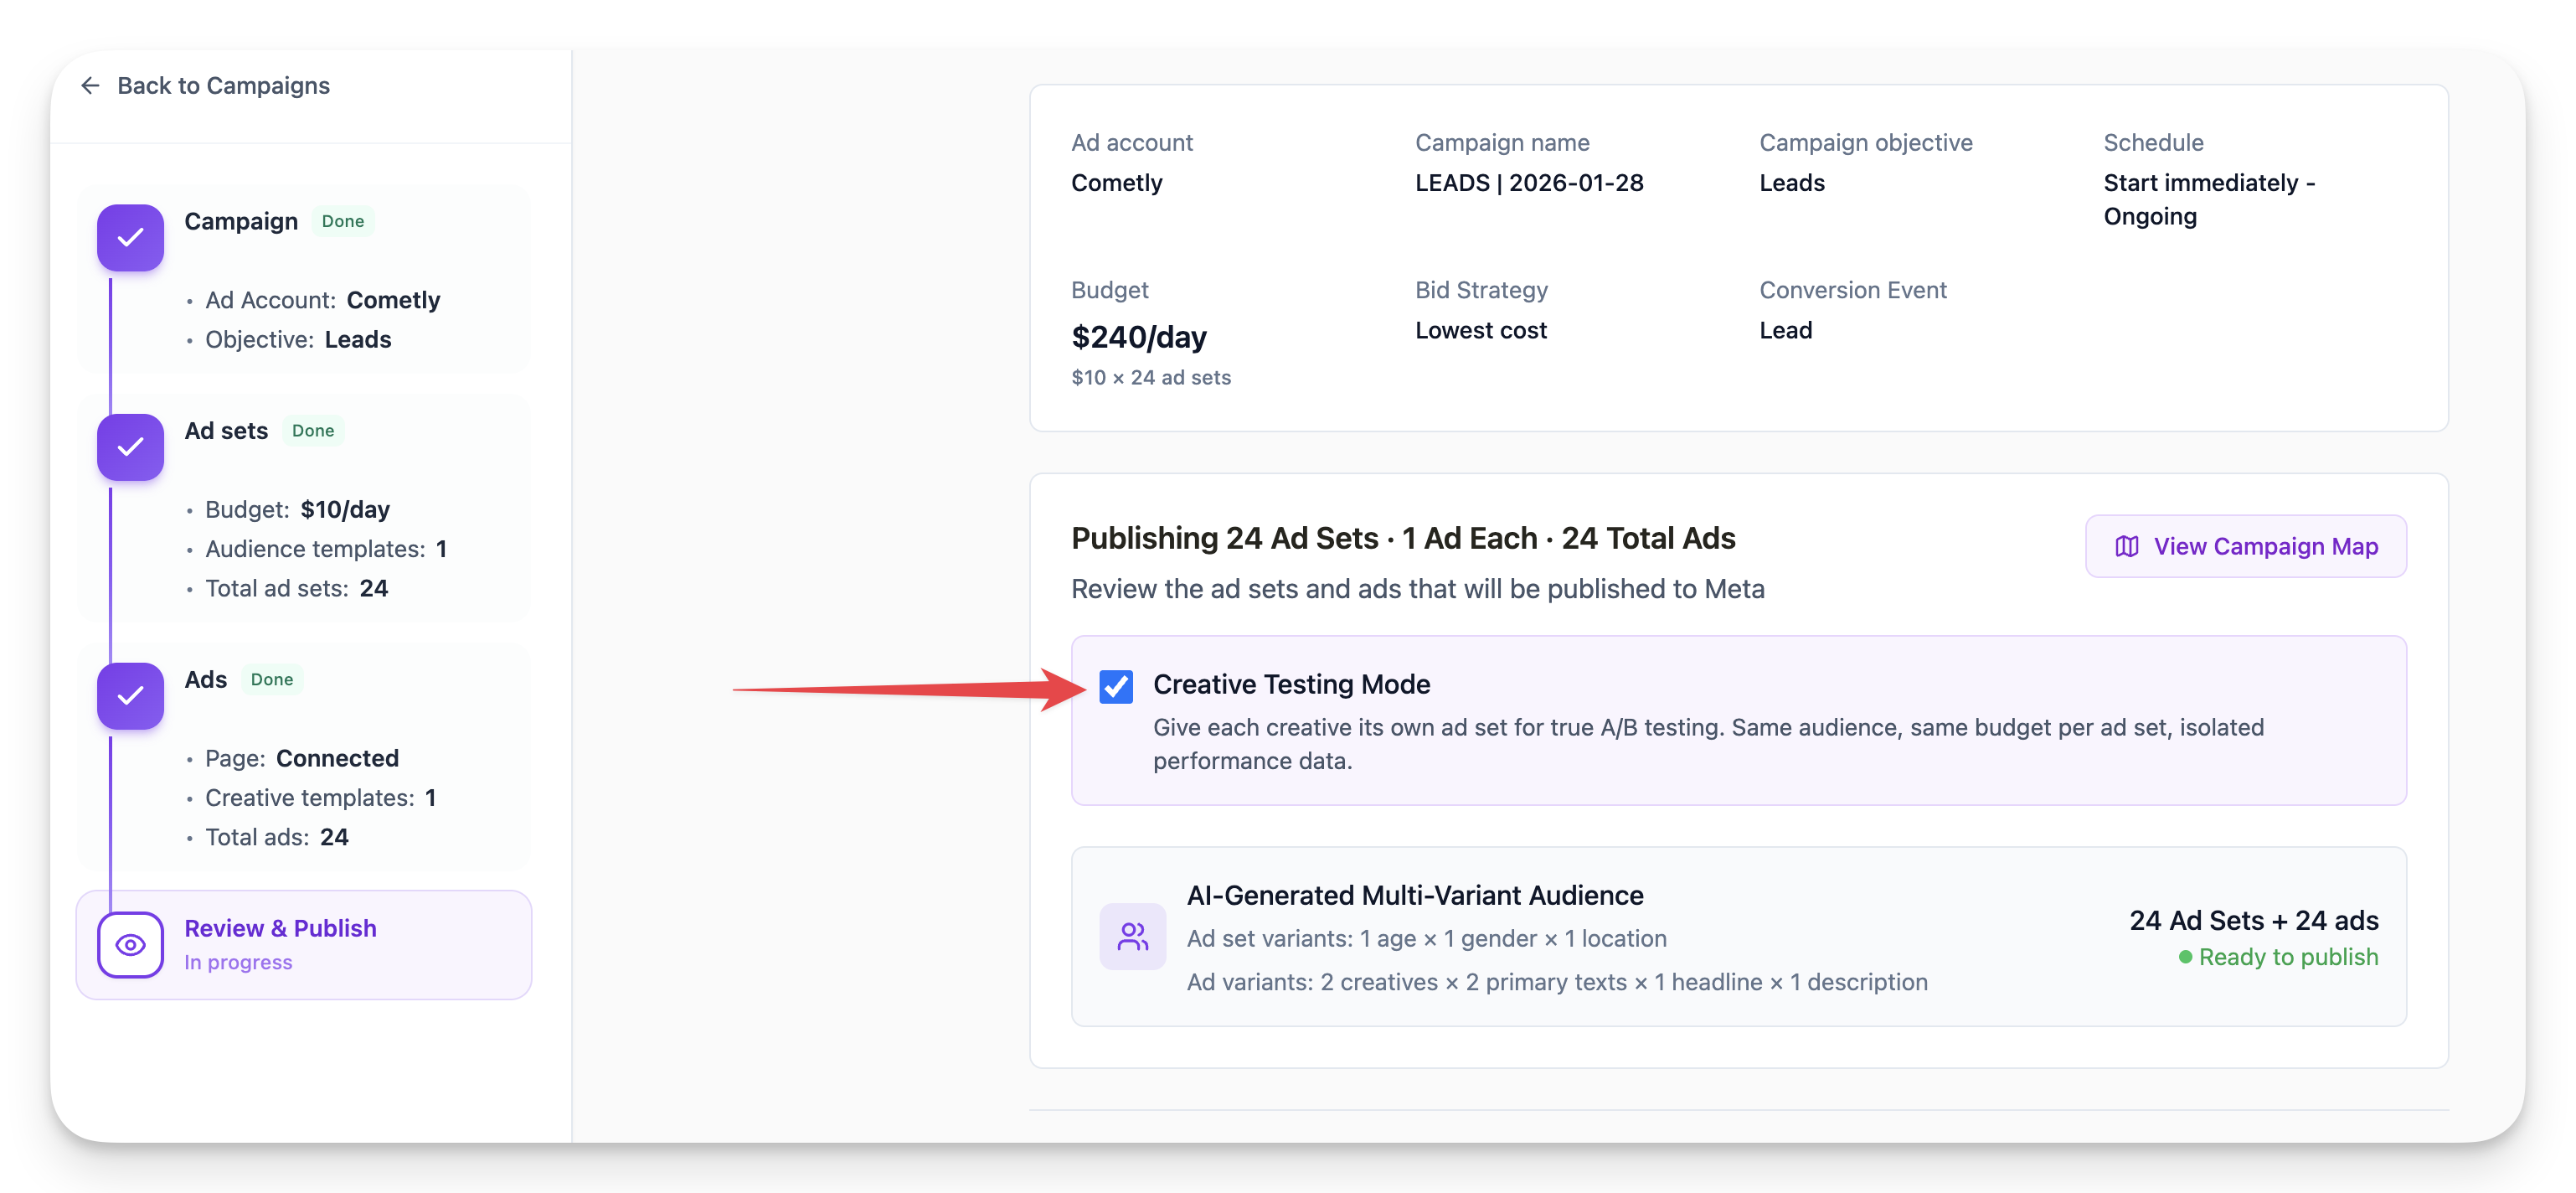 Why use this? When multiple ads share an ad set, Meta decides how to distribute budget. With one ad per ad set, every ad gets equal budget distribution for true split testing.
Creative Testing Mode increases your total budget significantly. For example, $10/day x 48 ad sets = $480/day vs. $10/day x 12 ad sets = $120/day.
## Publishing to Meta
Click **Publish** to send the campaign to your Meta ad account.
Campaigns publish as **inactive**. This lets you review everything in Ads Manager before turning them on.
### Setting Goals
After publishing, you'll be prompted to configure results and goals:
Choose the campaign you just published.
Pick the metric that matches your campaign goal (e.g., Purchases, Leads, Add to Carts).
Define a target cost per result if desired.
### Monitoring Your Launch
The launch progress screen shows:
* Percentage complete
* Ad sets created
* Ads created
Most launches complete within a few minutes.
## After Publishing
Once complete:
* Click **View in Meta** to open your campaign in Ads Manager
* Review the campaign structure
* Turn on ad sets when ready to go live
All your launches appear in the Launches section for easy reference. You can clear old launches if the list gets too long.
## Troubleshooting
If you see partial launches, errors, or retry prompts, this is usually due to Meta's API rate limiting or updates. Use the support chat in the bottom right corner for help with any issues.
Why use this? When multiple ads share an ad set, Meta decides how to distribute budget. With one ad per ad set, every ad gets equal budget distribution for true split testing.
Creative Testing Mode increases your total budget significantly. For example, $10/day x 48 ad sets = $480/day vs. $10/day x 12 ad sets = $120/day.
## Publishing to Meta
Click **Publish** to send the campaign to your Meta ad account.
Campaigns publish as **inactive**. This lets you review everything in Ads Manager before turning them on.
### Setting Goals
After publishing, you'll be prompted to configure results and goals:
Choose the campaign you just published.
Pick the metric that matches your campaign goal (e.g., Purchases, Leads, Add to Carts).
Define a target cost per result if desired.
### Monitoring Your Launch
The launch progress screen shows:
* Percentage complete
* Ad sets created
* Ads created
Most launches complete within a few minutes.
## After Publishing
Once complete:
* Click **View in Meta** to open your campaign in Ads Manager
* Review the campaign structure
* Turn on ad sets when ready to go live
All your launches appear in the Launches section for easy reference. You can clear old launches if the list gets too long.
## Troubleshooting
If you see partial launches, errors, or retry prompts, this is usually due to Meta's API rate limiting or updates. Use the support chat in the bottom right corner for help with any issues.